缘起
本文是《虚拟私有网络VPN》系列的第3篇。在前两篇文章中,我介绍了VPN的基础概念和使用场景,以及如何使用Tailscale来搭建一个私有虚拟网络。本系列的其他文章参见:
在上一篇文章中,我介绍了如何使用Tailscale来搭建一个私有虚拟网络。Tailscale是一个基于WireGuard的VPN解决方案,它可以帮助我们快速地搭建一个私有虚拟网络。但是官方版的Tailscale使用的是Tailscale的控制服务器,这意味着我们的数据和网络流量会经过Tailscale的服务器。虽然这些数据和流量已经经过加密,但如果我们希望完全控制自己的网络环境,或者出于隐私和安全的考虑,我们可以自己来搭建一个Tailscale的控制服务器。来实现这个功能的工具就是Headscale。
前提
- 了解容器和Docker的基本使用
- 了解反向代理的基本概念
- 有一个固定的IP地址(这个很重要,之前的文章中提到如果没有固定IP,可以使用Cloudflare Tunnel来做反向代理,但是Cloudflare Tunnel无法代理Headscale的服务。后文会说这个问题,但我并没有解决方案。)
Headscale
Headscale简介
Headscale是一个开源的Tailscale控制服务器实现,它允许用户在自己的基础设施上托管Tailscale的控制平面。通过使用Headscale,用户可以完全控制自己的VPN环境,而无需依赖Tailscale的官方服务器。其GitHub地址是:headscale。
另外,为了方便用户管理Headscale,开发者开发了不少能够与Headscale集成的Web界面工具,详情见:headscale-web。我只尝试了headplane和headscale-ui。headscale-ui没能成功运行,而headplane直接就部署成功了。它们的功能应该都差不多,我也懒得去探索为啥headscale-ui没能成功运行了,就直接用headplane了。
Headscale的工作原理
Headscale通过实现Tailscale的控制协议,充当Tailscale客户端和服务器之间的中介。用户可以将Tailscale客户端配置为使用Headscale作为控制服务器,从而实现对VPN连接的完全控制。Headscale支持Tailscale的所有主要功能,包括身份验证、设备注册和网络配置。
使用Docker部署Headscale和Headplane
这里我们将Headscale和Headplane两个服务部署在同一个Docker容器中。Headscale和Headplane都需要配置文件,我们分别为它们创建存放配置文件的目录,于是整个项目的目录结构如下:
1
2
3
4
5
6
7
|
headscale/
├── headplane/
│   └── config.yaml
├── headscale/
│   └── config.yaml
└── docker-compose.yaml
└── .env
|
接下来我们就来创建这些文件。
1. Docker Compose文件
创建docker-compose.yaml文件,内容如下:
 1
 2
 3
 4
 5
 6
 7
 8
 9
10
11
12
13
14
15
16
17
18
19
20
21
|
version: '3.5'
services:
  headscale:
    image: headscale/headscale:v0.26
    container_name: headscale
    volumes:
      - ./headscale/config:/etc/headscale
      - ${DATA_DIR}/headscale/data:/var/lib/headscale
      - /etc/timezone:/etc/timezone:ro
      - /etc/localtime:/etc/localtime:ro
    command: serve
    restart: unless-stopped
  headplane:
    container_name: headplane
    image: ghcr.io/tale/headplane:0.6.0
    restart: unless-stopped
    volumes:
      - './headplane/config/config.yaml:/etc/headplane/config.yaml'
      - './headscale/config/config.yaml:/etc/headscale/config.yaml'
      - '${DATA_DIR}/headplane/data:/var/lib/headplane'
      - '/var/run/docker.sock:/var/run/docker.sock:ro'
|
注意:
2. Headscale的配置
Headscale的配置文件位于./headscale/config/config.yaml,你可以根据需要进行修改。以下是一个示例配置:
  1
  2
  3
  4
  5
  6
  7
  8
  9
 10
 11
 12
 13
 14
 15
 16
 17
 18
 19
 20
 21
 22
 23
 24
 25
 26
 27
 28
 29
 30
 31
 32
 33
 34
 35
 36
 37
 38
 39
 40
 41
 42
 43
 44
 45
 46
 47
 48
 49
 50
 51
 52
 53
 54
 55
 56
 57
 58
 59
 60
 61
 62
 63
 64
 65
 66
 67
 68
 69
 70
 71
 72
 73
 74
 75
 76
 77
 78
 79
 80
 81
 82
 83
 84
 85
 86
 87
 88
 89
 90
 91
 92
 93
 94
 95
 96
 97
 98
 99
100
101
102
103
104
105
106
107
108
109
110
111
112
113
114
115
116
117
118
119
120
121
122
123
124
125
126
127
128
129
130
131
132
133
134
135
136
137
138
139
140
141
142
143
144
145
146
147
148
149
150
151
152
153
154
155
156
157
158
159
160
161
162
163
164
165
166
167
168
169
170
171
172
173
174
175
176
177
178
179
180
181
182
183
184
185
186
187
188
189
190
191
192
193
194
195
196
197
198
199
200
201
202
203
204
205
206
207
208
209
210
211
212
213
214
215
216
217
218
219
220
221
222
223
224
225
226
227
228
229
230
231
232
233
234
235
236
237
238
239
240
241
242
243
244
245
246
247
248
249
250
251
252
253
254
255
256
257
258
259
260
261
262
263
264
265
266
267
268
269
270
271
272
273
274
275
276
277
278
279
280
281
282
283
284
285
286
287
288
289
290
291
292
293
294
295
296
297
298
299
300
301
302
303
304
305
306
307
308
309
310
311
312
313
314
315
316
317
318
319
320
321
322
323
324
325
326
327
328
329
330
331
332
333
334
335
336
337
338
339
340
341
342
343
344
345
346
347
348
349
350
351
352
353
354
355
356
357
358
359
360
361
362
363
364
365
366
367
368
369
370
371
372
373
374
375
376
377
378
379
380
381
382
383
384
385
386
387
388
389
390
391
392
393
394
395
396
397
398
399
400
401
402
403
404
|
---
# headscale will look for a configuration file named `config.yaml` (or `config.json`) in the following order:
#
# - `/etc/headscale`
# - `~/.headscale`
# - current working directory

# The url clients will connect to.
# Typically this will be a domain like:
#
# https://myheadscale.example.com:443
#
server_url: https://<headscale.example.com>

# Address to listen to / bind to on the server
#
# For production:
listen_addr: 0.0.0.0:8080
#listen_addr: 127.0.0.1:8080

# Address to listen to /metrics, you may want
# to keep this endpoint private to your internal
# network
#
metrics_listen_addr: 127.0.0.1:9090

# Address to listen for gRPC.
# gRPC is used for controlling a headscale server
# remotely with the CLI
# Note: Remote access _only_ works if you have
# valid certificates.
#
# For production:
grpc_listen_addr: 0.0.0.0:50443
#grpc_listen_addr: 127.0.0.1:50443

# Allow the gRPC admin interface to run in INSECURE
# mode. This is not recommended as the traffic will
# be unencrypted. Only enable if you know what you
# are doing.
grpc_allow_insecure: false

# The Noise section includes specific configuration for the
# TS2021 Noise protocol
noise:
  # The Noise private key is used to encrypt the
  # traffic between headscale and Tailscale clients when
  # using the new Noise-based protocol.
  private_key_path: /var/lib/headscale/noise_private.key

# List of IP prefixes to allocate tailaddresses from.
# Each prefix consists of either an IPv4 or IPv6 address,
# and the associated prefix length, delimited by a slash.
# It must be within IP ranges supported by the Tailscale
# client - i.e., subnets of 100.64.0.0/10 and fd7a:115c:a1e0::/48.
# See below:
# IPv6: https://github.com/tailscale/tailscale/blob/22ebb25e833264f58d7c3f534a8b166894a89536/net/tsaddr/tsaddr.go#LL81C52-L81C71
# IPv4: https://github.com/tailscale/tailscale/blob/22ebb25e833264f58d7c3f534a8b166894a89536/net/tsaddr/tsaddr.go#L33
# Any other range is NOT supported, and it will cause unexpected issues.
prefixes:
  v4: 100.64.0.0/10
  v6: fd7a:115c:a1e0::/48

  # Strategy used for allocation of IPs to nodes, available options:
  # - sequential (default): assigns the next free IP from the previous given IP.
  # - random: assigns the next free IP from a pseudo-random IP generator (crypto/rand).
  allocation: sequential

# DERP is a relay system that Tailscale uses when a direct
# connection cannot be established.
# https://tailscale.com/blog/how-tailscale-works/#encrypted-tcp-relays-derp
#
# headscale needs a list of DERP servers that can be presented
# to the clients.
derp:
  server:
    # If enabled, runs the embedded DERP server and merges it into the rest of the DERP config
    # The Headscale server_url defined above MUST be using https, DERP requires TLS to be in place
    enabled: false

    # Region ID to use for the embedded DERP server.
    # The local DERP prevails if the region ID collides with other region ID coming from
    # the regular DERP config.
    region_id: 999

    # Region code and name are displayed in the Tailscale UI to identify a DERP region
    region_code: "headscale"
    region_name: "Headscale Embedded DERP"

    # Listens over UDP at the configured address for STUN connections - to help with NAT traversal.
    # When the embedded DERP server is enabled stun_listen_addr MUST be defined.
    #
    # For more details on how this works, check this great article: https://tailscale.com/blog/how-tailscale-works/
    stun_listen_addr: "0.0.0.0:3478"

    # Private key used to encrypt the traffic between headscale DERP
    # and Tailscale clients.
    # The private key file will be autogenerated if it's missing.
    #
    private_key_path: /var/lib/headscale/derp_server_private.key

    # This flag can be used, so the DERP map entry for the embedded DERP server is not written automatically,
    # it enables the creation of your very own DERP map entry using a locally available file with the parameter DERP.paths
    # If you enable the DERP server and set this to false, it is required to add the DERP server to the DERP map using DERP.paths
    automatically_add_embedded_derp_region: true

    # For better connection stability (especially when using an Exit-Node and DNS is not working),
    # it is possible to optionally add the public IPv4 and IPv6 address to the Derp-Map using:
    ipv4: 1.2.3.4
    ipv6: 2001:db8::1

  # List of externally available DERP maps encoded in JSON
  urls:
    - https://controlplane.tailscale.com/derpmap/default

  # Locally available DERP map files encoded in YAML
  #
  # This option is mostly interesting for people hosting
  # their own DERP servers:
  # https://tailscale.com/kb/1118/custom-derp-servers/
  #
  # paths:
  #   - /etc/headscale/derp-example.yaml
  paths: []

  # If enabled, a worker will be set up to periodically
  # refresh the given sources and update the derpmap
  # will be set up.
  auto_update_enabled: true

  # How often should we check for DERP updates?
  update_frequency: 24h

# Disables the automatic check for headscale updates on startup
disable_check_updates: false

# Time before an inactive ephemeral node is deleted?
ephemeral_node_inactivity_timeout: 30m

database:
  # Database type. Available options: sqlite, postgres
  # Please note that using Postgres is highly discouraged as it is only supported for legacy reasons.
  # All new development, testing and optimisations are done with SQLite in mind.
  type: sqlite

  # Enable debug mode. This setting requires the log.level to be set to "debug" or "trace".
  debug: false

  # GORM configuration settings.
  gorm:
    # Enable prepared statements.
    prepare_stmt: true

    # Enable parameterized queries.
    parameterized_queries: true

    # Skip logging "record not found" errors.
    skip_err_record_not_found: true

    # Threshold for slow queries in milliseconds.
    slow_threshold: 1000

  # SQLite config
  sqlite:
    path: /var/lib/headscale/db.sqlite

    # Enable WAL mode for SQLite. This is recommended for production environments.
    # https://www.sqlite.org/wal.html
    write_ahead_log: true

    # Maximum number of WAL file frames before the WAL file is automatically checkpointed.
    # https://www.sqlite.org/c3ref/wal_autocheckpoint.html
    # Set to 0 to disable automatic checkpointing.
    wal_autocheckpoint: 1000

  # # Postgres config
  # Please note that using Postgres is highly discouraged as it is only supported for legacy reasons.
  # See database.type for more information.
  # postgres:
  #   # If using a Unix socket to connect to Postgres, set the socket path in the 'host' field and leave 'port' blank.
  #   host: localhost
  #   port: 5432
  #   name: headscale
  #   user: foo
  #   pass: bar
  #   max_open_conns: 10
  #   max_idle_conns: 10
  #   conn_max_idle_time_secs: 3600

  #   # If other 'sslmode' is required instead of 'require(true)' and 'disabled(false)', set the 'sslmode' you need
  #   # in the 'ssl' field. Refers to https://www.postgresql.org/docs/current/libpq-ssl.html Table 34.1.
  #   ssl: false

### TLS configuration
#
## Let's encrypt / ACME
#
# headscale supports automatically requesting and setting up
# TLS for a domain with Let's Encrypt.
#
# URL to ACME directory
acme_url: https://acme-v02.api.letsencrypt.org/directory

# Email to register with ACME provider
acme_email: ""

# Domain name to request a TLS certificate for:
tls_letsencrypt_hostname: ""

# Path to store certificates and metadata needed by
# letsencrypt
# For production:
tls_letsencrypt_cache_dir: /var/lib/headscale/cache

# Type of ACME challenge to use, currently supported types:
# HTTP-01 or TLS-ALPN-01
# See: docs/ref/tls.md for more information
tls_letsencrypt_challenge_type: HTTP-01
# When HTTP-01 challenge is chosen, letsencrypt must set up a
# verification endpoint, and it will be listening on:
# :http = port 80
tls_letsencrypt_listen: ":http"

## Use already defined certificates:
tls_cert_path: ""
tls_key_path: ""

log:
  # Output formatting for logs: text or json
  format: text
  level: info

## Policy
# headscale supports Tailscale's ACL policies.
# Please have a look to their KB to better
# understand the concepts: https://tailscale.com/kb/1018/acls/
policy:
  # The mode can be "file" or "database" that defines
  # where the ACL policies are stored and read from.
  mode: file
  # If the mode is set to "file", the path to a
  # HuJSON file containing ACL policies.
  path: ""

## DNS
#
# headscale supports Tailscale's DNS configuration and MagicDNS.
# Please have a look to their KB to better understand the concepts:
#
# - https://tailscale.com/kb/1054/dns/
# - https://tailscale.com/kb/1081/magicdns/
# - https://tailscale.com/blog/2021-09-private-dns-with-magicdns/
#
# Please note that for the DNS configuration to have any effect,
# clients must have the `--accept-dns=true` option enabled. This is the
# default for the Tailscale client. This option is enabled by default
# in the Tailscale client.
#
# Setting _any_ of the configuration and `--accept-dns=true` on the
# clients will integrate with the DNS manager on the client or
# overwrite /etc/resolv.conf.
# https://tailscale.com/kb/1235/resolv-conf
#
# If you want stop Headscale from managing the DNS configuration
# all the fields under `dns` should be set to empty values.
dns:
  # Whether to use [MagicDNS](https://tailscale.com/kb/1081/magicdns/).
  magic_dns: true

  # Defines the base domain to create the hostnames for MagicDNS.
  # This domain _must_ be different from the server_url domain.
  # `base_domain` must be a FQDN, without the trailing dot.
  # The FQDN of the hosts will be
  # `hostname.base_domain` (e.g., _myhost.example.com_).
  base_domain: <hs.example.com>

  # List of DNS servers to expose to clients.
  nameservers:
    global:
      - 1.1.1.1
      - 1.0.0.1
      - 2606:4700:4700::1111
      - 2606:4700:4700::1001

      # NextDNS (see https://tailscale.com/kb/1218/nextdns/).
      # "abc123" is example NextDNS ID, replace with yours.
      # - https://dns.nextdns.io/abc123

    # Split DNS (see https://tailscale.com/kb/1054/dns/),
    # a map of domains and which DNS server to use for each.
    split:
      {}
      # foo.bar.com:
      #   - 1.1.1.1
      # darp.headscale.net:
      #   - 1.1.1.1
      #   - 8.8.8.8

  # Set custom DNS search domains. With MagicDNS enabled,
  # your tailnet base_domain is always the first search domain.
  search_domains: []

  # Extra DNS records
  # so far only A and AAAA records are supported (on the tailscale side)
  # See: docs/ref/dns.md
  extra_records: []
  #   - name: "grafana.myvpn.example.com"
  #     type: "A"
  #     value: "100.64.0.3"
  #
  #   # you can also put it in one line
  #   - { name: "prometheus.myvpn.example.com", type: "A", value: "100.64.0.3" }
  #
  # Alternatively, extra DNS records can be loaded from a JSON file.
  # Headscale processes this file on each change.
  # extra_records_path: /var/lib/headscale/extra-records.json

# Unix socket used for the CLI to connect without authentication
# Note: for production you will want to set this to something like:
unix_socket: /var/run/headscale/headscale.sock
unix_socket_permission: "0770"
#
# headscale supports experimental OpenID connect support,
# it is still being tested and might have some bugs, please
# help us test it.
# OpenID Connect
oidc:
  only_start_if_oidc_is_available: true
  issuer: "https://your-oidc.issuer.com/path"
  client_id: "your-oidc-client-id"
  client_secret: "your-oidc-client-secret"
  # Alternatively, set `client_secret_path` to read the secret from the file.
  # It resolves environment variables, making integration to systemd's
  # `LoadCredential` straightforward:
#   client_secret_path: "${CREDENTIALS_DIRECTORY}/oidc_client_secret"
#   # client_secret and client_secret_path are mutually exclusive.

  # The amount of time from a node is authenticated with OpenID until it
  # expires and needs to reauthenticate.
  # Setting the value to "0" will mean no expiry.
  expiry: 180d

  # Use the expiry from the token received from OpenID when the user logged
  # in, this will typically lead to frequent need to reauthenticate and should
  # only been enabled if you know what you are doing.
  # Note: enabling this will cause `oidc.expiry` to be ignored.
  use_expiry_from_token: false

  # Customize the scopes used in the OIDC flow, defaults to "openid", "profile" and "email" and add custom query
  # parameters to the Authorize Endpoint request. Scopes default to "openid", "profile" and "email".

  scope: ["openid", "profile", "email"]
#   extra_params:
#     domain_hint: example.com
#
#   # List allowed principal domains and/or users. If an authenticated user's domain is not in this list, the
#   # authentication request will be rejected.
#
#   allowed_domains:
#     - example.com
#   # Note: Groups from keycloak have a leading '/'
#   allowed_groups:
#     - /headscale
#   allowed_users:
#     - [email protected]
#
#   # Optional: PKCE (Proof Key for Code Exchange) configuration
#   # PKCE adds an additional layer of security to the OAuth 2.0 authorization code flow
#   # by preventing authorization code interception attacks
#   # See https://datatracker.ietf.org/doc/html/rfc7636
#   pkce:
#     # Enable or disable PKCE support (default: false)
#     enabled: false
#     # PKCE method to use:
#     # - plain: Use plain code verifier
#     # - S256: Use SHA256 hashed code verifier (default, recommended)
#     method: S256
#
#   # Map legacy users from pre-0.24.0 versions of headscale to the new OIDC users
#   # by taking the username from the legacy user and matching it with the username
#   # provided by the OIDC. This is useful when migrating from legacy users to OIDC
#   # to force them using the unique identifier from the OIDC and to give them a
#   # proper display name and picture if available.
#   # Note that this will only work if the username from the legacy user is the same
#   # and there is a possibility for account takeover should a username have changed
#   # with the provider.
#   # When this feature is disabled, it will cause all new logins to be created as new users.
#   # Note this option will be removed in the future and should be set to false
#   # on all new installations, or when all users have logged in with OIDC once.
#   map_legacy_users: false

# Logtail configuration
# Logtail is Tailscales logging and auditing infrastructure, it allows the control panel
# to instruct tailscale nodes to log their activity to a remote server.
logtail:
  # Enable logtail for this headscales clients.
  # As there is currently no support for overriding the log server in headscale, this is
  # disabled by default. Enabling this will make your clients send logs to Tailscale Inc.
  enabled: false

# Enabling this option makes devices prefer a random port for WireGuard traffic over the
# default static port 41641. This option is intended as a workaround for some buggy
# firewall devices. See https://tailscale.com/kb/1181/firewalls/ for more information.
randomize_client_port: false
|
3. Headplane的配置
Headplane的配置文件位于./headplane/config/config.yaml,你可以根据需要进行修改。以下是一个示例配置:
 1
 2
 3
 4
 5
 6
 7
 8
 9
10
11
12
13
14
15
16
17
18
19
20
21
22
23
24
25
26
27
28
29
30
31
32
33
34
35
36
37
38
39
40
41
42
43
44
45
46
47
48
|
server:
    host: "0.0.0.0"
    port: 3000
    cookie_secret: "32-character-long-random-string"
    cookie_secure: false

headscale:
    url: "https://<headscale.example.com>"
    config_path: "/etc/headscale/config.yaml"
    config_strict: true

integration:
    docker:
        enabled: true
        container_name: "headscale"
        socket: "unix:///var/run/docker.sock"

oidc:
  issuer: "https://<authelia.example.com>"
  client_id: "headplane"

  # The client secret for the OIDC client
  # Either this or `client_secret_path` must be set for OIDC to work
  client_secret: "some-random-client-secret"
  # You can alternatively set `client_secret_path` to read the secret from disk.
  # The path specified can resolve environment variables, making integration
  # with systemd's `LoadCredential` straightforward:
  # client_secret_path: "${CREDENTIALS_DIRECTORY}/oidc_client_secret"

  disable_api_key_login: false
  token_endpoint_auth_method: "client_secret_post"

  # If you are using OIDC, you need to generate an API key
  # that can be used to authenticate other sessions when signing in.
  #
  # This can be done with `headscale apikeys create --expiration 999d`
  headscale_api_key: "your-headscale-api-key"

  # Optional, but highly recommended otherwise Headplane
  # will attempt to automatically guess this from the issuer
  #
  # This should point to your publicly accessibly URL
  # for your Headplane instance with /admin/oidc/callback
  redirect_uri: 'https://<url-to-your-headplane>/admin/oidc/callback'

  # Stores the users and their permissions for Headplane
  # This is a path to a JSON file, default is specified below.
  user_storage_file: "/var/lib/headplane/users.json"
|
集成Authelia进行身份验证
上述配置中,Headplane使用了OIDC(OpenID Connect)来进行身份验证。你可以使用Authelia作为OIDC提供者。Authelia的配置文件通常位于/etc/authelia/configuration.yml,你需要在其中添加一个OIDC客户端配置。以下是一个示例配置:
 1
 2
 3
 4
 5
 6
 7
 8
 9
10
11
12
13
14
15
16
17
18
19
|
identity_providers:
  oidc:
    clients:
      - client_id: 'headplane'
        client_name: 'Headplane OIDC Client'
        client_secret: 'client-secret'
        public: false
        authorization_policy: one_factor
        redirect_uris:
          - 'https://example.com/oidc/callback'
        scopes:
          - openid
          - profile
          - email
        grant_types:
          - authorization_code
        response_types:
          - code
        token_endpoint_auth_method: client_secret_post
|
确保这里的client_id、client_secret和redirect_uris与你在Headplane配置中的设置一致。
启动服务
在创建好上述文件后,你可以使用以下命令来启动Headscale和Headplane服务:
如果一切正常,你应该能够通过浏览器访问Headplane的Web界面,地址为http://<your-server-ip>:3000/admin/(注意,在地址后的/admin/非常重要,如果不带这个路径,你会看到一个404错误页面)。你会看到如下界面:
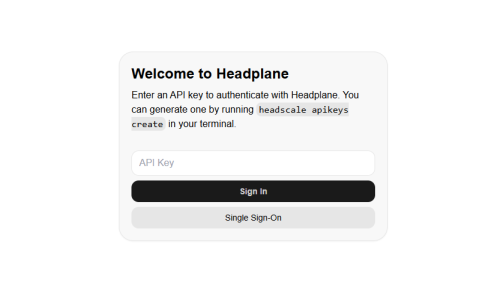
如果你没有配置OIDC身份验证,那么你在上述页面中不会看到Single Sign On选项。你可以直接使用Headscale的API密钥进行登录。你可以通过Headscale容器的命令行界面创建API密钥,命令如下:
1
|
docker exec -it headscale headscale apikeys create --expiration 999d
|
这将生成一个API密钥,你可以在Headplane的登录界面中使用这个密钥进行登录。
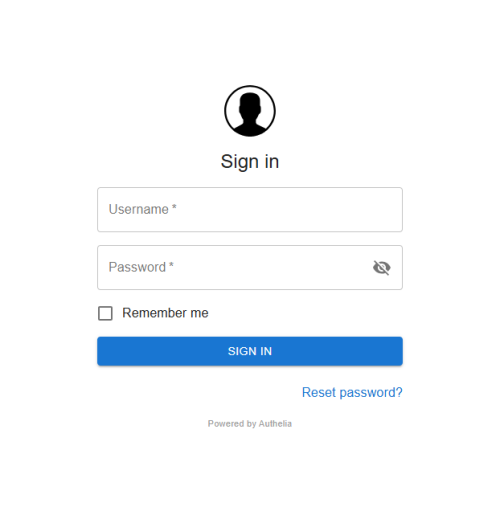
如果你配置了OIDC身份验证,你可以在登录界面中选择Single Sign On选项,会跳转到OIDC提供者的登录页面(例如Authelia):
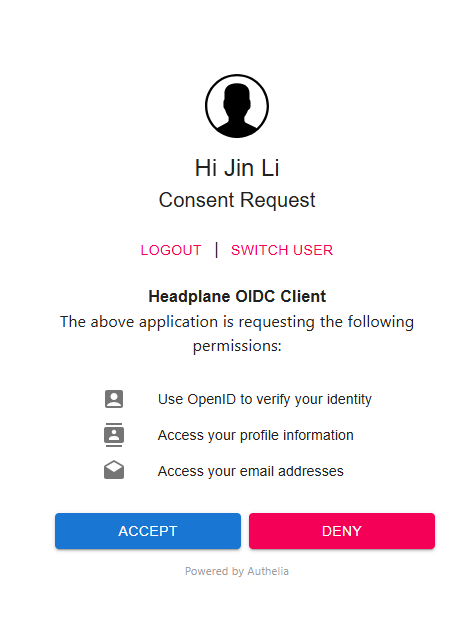
然后点击确认授权登录:
你就可以看到Headplane的管理界面了:
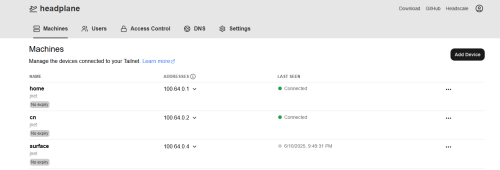
这个界面跟Tailscale的Web界面非常相似,你可以在这里管理你的Headscale服务器、查看连接的设备、创建预授权密钥等。
使用Tailscale连接到Headscale
Tailscale的客户端默认会连接到Tailscale的官方控制服务器,但我们可以将其配置为连接到我们自己的Headscale服务器。在macOS或者安卓手机上,你可以在Tailscale的设置中找到“控制服务器”选项,将其设置为你的Headscale服务器地址,例如https://<headscale.example.com>。
但在Windows上,我似乎没有找到这个选项。我们可以通过命令行来设置Tailscale的控制服务器。打开命令提示符或者PowerShell,运行以下命令:
1
|
tailscale up --login-server https://<headscale.example.com>
|
如果你的Headscale服务运行正常且部署了身份验证,运行上述命令后,你会看到输出了一个URL链接地址,在浏览器中打开这个链接,你就会看到身份验证的登录界面。登录后,你会看到一个授权页面,点击“授权”按钮,Tailscale客户端就会连接到你的Headscale服务器。
如果你没有配置OIDC身份验证,你可以通过提供preauthkeys来进行登录。首先,你需要在Headscale容器中创建一个预授权密钥,命令如下:
1
|
docker exec -it headscale headscale preauthkeys create --reusable --user your_user --expiration=72h
|
这将生成一个预授权密钥,你可以在Tailscale客户端中使用这个密钥进行登录。运行以下命令:
1
|
tailscale up --authkey <your_preauth_key>
|
问题解决
1. 使用Nginx作为反向代理时的问题
使用如下命令查看Tailscale日志:
1
|
journalctl -u tailscaled -f
|
得到如下输出:
1
2
3
4
5
6
7
|
Apr 30 20:34:36 fedora tailscaled[1058]: control: LoginInteractive -> regen=true
Apr 30 20:34:36 fedora tailscaled[1058]: control: doLogin(regen=true, hasUrl=false)
Apr 30 20:34:36 fedora tailscaled[1058]: control: control server key from https://<headscale domain name>: ts2021=[lx/4O], legacy=
Apr 30 20:34:36 fedora tailscaled[1058]: control: Generating a new nodekey.
Apr 30 20:34:36 fedora tailscaled[1058]: control: RegisterReq: onode= node=[W5uIA] fup=false nks=false
Apr 30 20:34:36 fedora tailscaled[1058]: control: controlhttp: forcing port 443 dial due to recent noise dial
Apr 30 20:34:46 fedora tailscaled[1058]: Received error: register request: Post "https://<headscale domain name>/machine/register": connection attempts aborted by context: context deadline exceeded
|
这说明Tailscale在向Headscale发送注册请求POST时,连接超时了。
然后我们检查Headscale docker容器的日志。可以在Portainer中查看,也可以使用以下命令:
1
|
docker logs <headscale_container_name>
|
发现里面一直在输出下述信息:
1
|
2025-04-30T21:45:45-04:00 WRN home/runner/work/headscale/headscale/hscontrol/noise.go:66 > No Upgrade header in TS2021 request. If headscale is behind a reverse proxy, make sure it is configured to pass WebSockets through.
|
我最开始以为这只是一个警告,众所周知,程序员是看不到警告的,所以我一直忽略了这条信息。直到在我排查了所有可能的错误之后,我才想着在网上搜一下这个警告。不搜不知道,一搜才发现这条警告正是导致Tailscale无法连接到Headscale的元凶。我真想问候这个程序员的家人,这么重要的信息怎么能归到警告里去呢?!
总之,这个警告的意思是说,如果Headscale部署在反向代理后面,需要确保反向代理配置正确,以便通过WebSockets进行通信。这里的配置是指在反向代理里要添加Upgrade头。如果你使用的是Nginx作为反向代理,可以在Nginx的配置文件中添加以下内容:
 1
 2
 3
 4
 5
 6
 7
 8
 9
10
11
12
|
location / {
    proxy_pass http://<headscale_ip>:<headscale_port>;

    proxy_http_version 1.1;
    proxy_set_header Upgrade $http_upgrade;
    proxy_set_header Connection "upgrade";

    proxy_set_header Host $host;
    proxy_set_header X-Real-IP $remote_addr;
    proxy_set_header X-Forwarded-For $proxy_add_x_forwarded_for;
    proxy_set_header X-Forwarded-Proto $scheme;
}
|
其中的重点就是proxy_set_header Upgrade $http_upgrade;和proxy_set_header Connection "upgrade";这两行,它们确保了WebSockets的连接可以正确地升级。
2. 使用Cloudflare Tunnel作为反向代理时的问题
之前考虑到固定IP不太好获取,所以我一直在尝试将之前的docker服务通过Cloudflare Tunnel来进行反向代理。详见下列文章:
因此在部署Headscale时,我也尝试使用Cloudflare Tunnel来进行反向代理。按照之前的文章配置好Cloudflare Tunnel之后,我发现Headscale的Web界面Headplane可以正常访问,但是Tailscale客户端却无法连接到Headscale。运行Tailscale登录命令时会卡住,查看Tailscale日志时发现如下错误:
1
2
3
4
5
6
7
|
Jun 24 15:29:02 fedora.attlocal.net tailscaled[885490]: Received error: register request: Post "https://headscale.example.com/machine/register": connection attempts aborted by context: context deadline exceeded
Jun 24 15:29:02 fedora.attlocal.net tailscaled[885490]: control: LoginInteractive -> regen=true
Jun 24 15:29:02 fedora.attlocal.net tailscaled[885490]: control: doLogin(regen=true, hasUrl=false)
Jun 24 15:29:02 fedora.attlocal.net tailscaled[885490]: control: control server key from https://headscale.example.com: ts2021=[lx/4O], legacy=
Jun 24 15:29:02 fedora.attlocal.net tailscaled[885490]: control: Generating a new nodekey.
Jun 24 15:29:02 fedora.attlocal.net tailscaled[885490]: control: RegisterReq: onode= node=[yFWNe] fup=false nks=false
Jun 24 15:29:02 fedora.attlocal.net tailscaled[885490]: control: controlhttp: forcing port 443 dial due to recent noise dial
|
Headscale容器的日志中有如下错误:
1
|
2025-06-24T17:53:20Z WRN home/runner/work/headscale/headscale/hscontrol/noise.go:66 > No Upgrade header in TS2021 request. If headscale is behind a reverse proxy, make sure it is configured to pass WebSockets through.
|
我在这个问题上得耗了有一两周的时间,尝试了各种方法,最终还是没能解决。
最后ChatGPT帮我分析了产生这个问题的原因,它认为这是遇到了免费版的Cloudflare Tunnel的限制。免费版的Cloudflare Tunnel只支持代理HTTP/1.1(+WebSocket upgrades)和HTTP/2+WebSocket流量。而Headscale报错说的TS2021 Noise handshake是通过HTTP2的纯gRPC流量进行的,因此无法通过Cloudflare Tunnel的免费版进行代理。
不过ChatGPT也提到,Cloudflare的付费版Tunnel支持HTTP/3和gRPC流量,因此如果你有Cloudflare的付费版账号,可以尝试使用付费版的Tunnel来进行代理。但我是放弃了。
这个问题在Cloudflare Tunnel GitHub仓库里也有人提Issue讨论,地址是:General Upgrade header support #990. 总之,我目前的结论就是Cloudflare Tunnel无法代理Headscale的服务。
Update 2025-11-17:在上面那个Issue里,最近有个叫[Sharpie]的用户(https://github.com/Sharpie)提到可以使用Ngrok,我暂时还没试这个方案,不知道是不是可以解决这个问题。具体可参见:https://github.com/cloudflare/cloudflared/issues/990#issuecomment-3448903844。