
Shell Configuration#
Configurations for Linux shell and Neovim
Linux Shell Configuration#
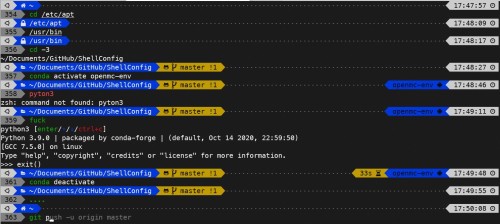
Features#
- Shell: oh-my-zsh
- Theme: powerlevel10k
- Plugins: zsh-autosuggestions, zsh-syntax-highlighting
Notice#
The powerlevel10k theme is no longer maintained as of May 2024, but it should still work fine. The author, romkatv, believes that powerlevel10k is mature and feature-complete. Most issues are either personalized requests or involve underlying changes that are unnecessary for 99% of users. If you are not in that 99%, you need to be able to modify the code to meet your needs. Therefore, romkatv has decided to stop maintaining the powerlevel10k theme. Here are the relevant discussions:
This post is now deprecated as the primary installation guide. The P10k-based configuration is kept here for reference, but new installations should use the successor post and its Oh My Posh-based configuration. The new setup uses one theme across Zsh and PowerShell and separates shared configuration from machine-local settings.
If you still need the legacy P10k setup, continue with the instructions below. Otherwise, follow the Oh My Posh migration guide.
Other alternatives include:
- starship: A cross-platform command line prompt that supports various shells. Compared to powerlevel10k, starship is easier to configure.
- oh-my-posh: A cross-platform command line prompt that was originally designed for PowerShell but now supports various shells, including zsh. oh-my-posh is also easy to configure.
Install#
Method 1: Use Installation Script (Recommend)#
Download the installation script:
1curl -s https://raw.githubusercontent.com/jin-li/ShellConfig/main/install_OhMyZsh_p10k.sh -o install_OhMyZsh_p10k.shRun the script:
Do NOT run it in
rootNOR usingsudo, just run it as a normal user. When it prompts for password, then enter therootorsudopassword.1 2chmod +x install_OhMyZsh_p10k.sh ./install_OhMyZsh_p10k.sh
Method 2: Manual Install#
Install Meslo Nerd Font
Download these four ttf files:
Double-click on each file and click “Install”. This will make
MesloLGS NFfont available to all applications on your system.For setting up the font in the preference of the terminals, please refer to p10k Font.
Ubuntu, Debian & derivatives
Update
aptsources1sudo apt updateInstall prerequisite tools (git, wget, python3, pip3)
1sudo apt install wget git python3-dev python3-pip python3-setuptoolsInstall zsh
1sudo apt install zsh
Arch Linux or Manjaro
1sudo pacman -S zshFedora
1sudo dnf install zsh
Install oh-my-zsh via wget
1sh -c "$(wget -O- https://raw.githubusercontent.com/ohmyzsh/ohmyzsh/master/tools/install.sh)"Install powerlevel10k
1git clone --depth=1 https://github.com/romkatv/powerlevel10k.git ${ZSH_CUSTOM:-$HOME/.oh-my-zsh/custom}/themes/powerlevel10kInstall plugins and tools
- zsh-autosuggestions
1git clone https://github.com/zsh-users/zsh-autosuggestions ${ZSH_CUSTOM:-~/.oh-my-zsh/custom}/plugins/zsh-autosuggestions - fast-syntax-highlighting
1git clone https://github.com/zdharma-continuum/fast-syntax-highlighting.git ${ZSH_CUSTOM:-$HOME/.oh-my-zsh/custom}/plugins/fast-syntax-highlighting
- zsh-autosuggestions
Download configuration files and link to home directory
- Download ShellConfig from GitHub
1 2 3mkdir -p ~/Documents/GitHub cd ~/Documents/GitHub git clone https://github.com/jin-li/ShellConfig.git - Backup old configuration files
1 2mv ~/.bashrc ~/.bashrc_bak mv ~/.zshrc ~/.zshrc_bak - Link configuration files to home directory
1 2 3ln ~/Documents/GitHub/ShellConfig/.bashrc ~/.bashrc ln ~/Documents/GitHub/ShellConfig/.zshrc ~/.zshrc ln ~/Documents/GitHub/ShellConfig/.p10k.zsh ~/.p10k.zsh
- Download ShellConfig from GitHub
Restart terminal
Vim Configuration#
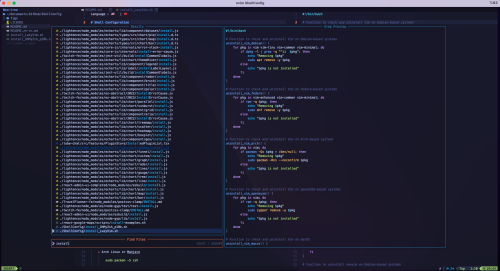
Motivation#
I migrated from vim to Neovim because of the better performance and more features.
LazyVim is a starter-friendly configuration for Neovim with the commonly used plugins. It is easy to install and use.
Method 1: Use Installation Script (Recommend)#
Download the installation script:
1curl -s https://raw.githubusercontent.com/jin-li/ShellConfig/main/install_LazyVim.sh -o install_LazyVim.shRun the script:
1 2chmod +x install_LazyVim.sh ./install_LazyVim.sh
Method 2: Manual Install#
Remove vim-tiny or vim-minimal
The default vim in Debian OS is vim-tiny (in Fedora is vim-minimal), which does not support the plugins. Use following command to check your vim version first before using this configuration.
1vi --versionIf there is “Small version without GUI” in the output, it means your vim is vim-tiny or vim-minimal. You can remove it:
- Debian / Ubuntu
1sudo apt remove vim-tiny - Fedora
1sudo dnf remove vim-minimal
- Debian / Ubuntu
Install Neovim
Then install Neovim.
Debian / Ubuntu
Since LazyVim requires Neovim 0.8 or later, in Ubuntu 22.04, the neovim version is 0.6.1. Therefore, We need to install the newer version of neovim from the official website.
- Download the pre-built binaries of Neovim from the official website
1curl -LO https://github.com/neovim/neovim/releases/latest/download/nvim-linux64.tar.gz - Extract the downloaded fileThis will install Neovim to /opt/nvim-linux64 directory.
1sudo tar -C /opt -xzf nvim-linux64.tar.gz - Create a symbolic link to the Neovim executable
1sudo ln -s /opt/nvim-linux64/bin/nvim /usr/bin/nvim
- Download the pre-built binaries of Neovim from the official website
Fedora
In Fedora 40, the Neovim version is 0.9.5, which is new enough to use LazyVim. So we can install it using dnf directly.
1sudo dnf install neovim
Install LazyVim
Refer to the official website, we can install LazyVim using the following command:
Install LazyVim
1git clone https://github.com/LazyVim/starter ~/.config/nvimRemove the
.gitfolder, so you can add it to your own repo later1rm -rf ~/.config/nvim/.gitFirst time run nvim will install the plugins automatically. It may take a while to finish.
1nvim
Replace macOS Terminal#
After installing LazyVim, I found that the display effect of LazyVim in macOS Terminal is very poor, with dim colors and low contrast:
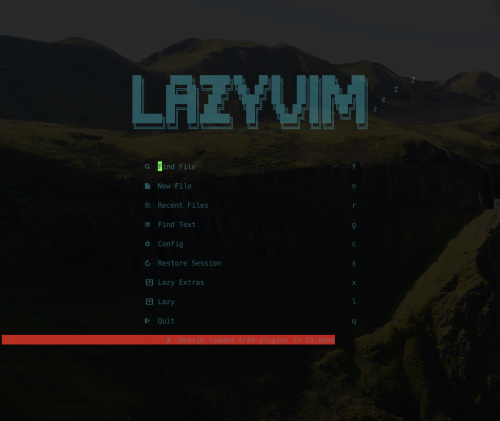
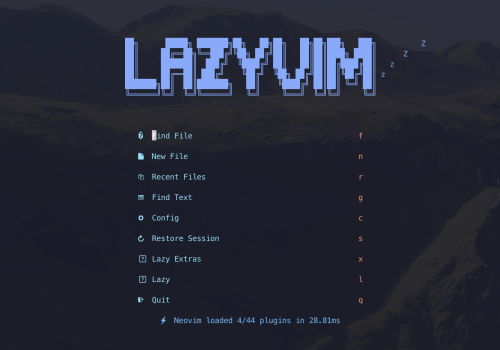
The reason is that the macOS Terminal’s color scheme does not support 256 true colors, while LazyVim defaults to a 256-color color scheme. I heard that iTerm2 supports 256 true colors, so I decided to migrate from the macOS built-in terminal to iTerm2. After installing iTerm2, you need to set iTerm2 to use the Meslo Nerd font you downloaded and installed earlier. Then open LazyVim in iTerm2, it looks much better now:
Issues#
On Fedora 42, after running the above script, when opening nvim, the nvim interface shows the following error:
| |
It’s because some plugins in LazyVim need to be compiled, but there is no C compiler installed on the system. You can install a C compiler, such as gcc or clang, to resolve this issue. For me, I installed zig, which is a lightweight compiler, also supports C:
| |
After installing zig, restart nvim, and the error should be resolved.