Motivation
This is the third article in the “Nvidia GPU” series, which mainly documents how to use Nvidia GPUs, especially on Linux systems. In the previous articles, I documented the relevant settings for using Nvidia GPUs on Ubuntu, including gaming, CUDA programming, deep learning, Docker containers, etc. Now I have migrated from Ubuntu to Fedora, and the settings for using Nvidia GPUs on Fedora are different from those on Ubuntu, so I am documenting them here.
Other articles in this series can be found at:
- Nvidia GPU (1): Games, CUDA Programming, Deep Learning, Docker Containers, etc. on Ubuntu
- Nvidia GPU (2): Accelerate Video Editing and Transcoding for FFmpeg Using GPU
- Nvidia GPU (4): Containerized Configuration of Nvidia GPU for CUDA Programming and Deep Learning Environment
Fedora Installation of Nvidia GPU Drivers
Check GPU Information
First, we need to check our GPU information. Open the terminal and enter the following command:
|
|
If you have an Nvidia GPU installed on your computer, you will see output similar to the following:
|
|
For some reason, my computer shows NVIDIA Corporation Device 2803 instead of RTX 4060 Ti, but it doesn’t matter. We just need to know that it’s an Nvidia GPU.
Install Nvidia GPU Drivers
In Ubuntu, we used the graphics-drivers package from the apt repository to install Nvidia GPU drivers. In Fedora, we need to use the rpmfusion repository to install Nvidia GPU drivers.
Compared to downloading and installing the driver directly from the Nvidia official website, using the rpmfusion repository to install Nvidia GPU drivers is simpler and more convenient. Additionally, since the drivers in rpmfusion have been tested on Fedora, they are more stable. The main steps are as follows:
-
Add the
rpmfusionrepository:1 2sudo dnf install https://download1.rpmfusion.org/free/fedora/rpmfusion-free-release-$(rpm -E %fedora).noarch.rpm sudo dnf install https://download1.rpmfusion.org/nonfree/fedora/rpmfusion-nonfree-release-$(rpm -E %fedora).noarch.rpmYou can also download the
rpmfusionrepository installation package corresponding to your Fedora version from the RPM Fusion official website. In the Fedora system, simply double-click the downloaded installation package, and Fedora will automatically open the Discover software center. Click the “Install” button in the title bar to proceed. Generally, we need to install two repositories:rpmfusion-freeandrpmfusion-nonfree. The former contains open-source software, while the latter contains non-open-source software.After installation, you can update the software repository:
1sudo dnf update -
Install Nvidia GPU drivers:
You can refer to the instructions on the RPM Fusion official website and use the following commands to install Nvidia GPU drivers:
1
2
sudo dnf install akmod-nvidia # rhel/centos users can use kmod-nvidia instead sudo dnf install xorg-x11-drv-nvidia-cuda #optional for cuda/nvdec/nvenc supportHere,
akmod-nvidiais the package name for Nvidia GPU drivers in Fedora. After installation, it will automatically compile the kernel module. -
(Optional) Secure Boot:
What is Secure Boot
Secure Boot is a security standard designed to ensure that a computer only loads verified operating systems and software during startup. It can prevent malicious software from loading during system startup, thereby enhancing system security. In simple terms, Secure Boot ensures that only trusted software can run when the system starts.
How Secure Boot Works
- The UEFI firmware contains a Secure Boot database that stores all trusted public keys and certificates. Generally, trusted public keys include those from operating system vendors, hardware vendors, and user-generated keys.
- When the computer starts, the UEFI firmware verifies whether each loaded component (such as the operating system kernel, drivers, etc.) is trusted.
- Only components registered in the Secure Boot database can be loaded; unauthorized components will be blocked.
Linux kernel modules (such as Nvidia GPU drivers) need to be signed to be loaded on systems with Secure Boot enabled. If the kernel module is not signed or the signature is not trusted, these modules will not load on systems with Secure Boot enabled, causing the GPU driver to fail. This is why, after installing Nvidia GPU drivers, you need to generate a signature for the Linux kernel module and register it in the Secure Boot database.
Do You Need Secure Boot
For ordinary users (i.e., users with limited knowledge of computers and who do not understand the computer startup process), my recommendation is to enable Secure Boot; for advanced users (who know what they are doing, especially those who understand what their system does during startup or know what they are making their system do during startup), my recommendation is that they can disable Secure Boot.
If Your Computer Has Secure Boot Enabled
If your computer has Secure Boot enabled, it may cause Nvidia GPU drivers to fail to load. You can disable Secure Boot in the BIOS.
If you do not want to disable Secure Boot, you can refer to the instructions on the RPM Fusion official website to register a key and add it to your system to enable Secure Boot. The specific steps are as follows:
-
Install Related Tools
1sudo dnf install kmodtool akmods mokutil openssl -
Generate Key
1sudo kmodgenca -a -
Register Key
1sudo mokutil --import /etc/pki/akmods/certs/public_key.derYou will be prompted to set a password, which you will need to enter after rebooting.
Note: Since the key is generated for the current kernel version, you may need to regenerate and register the key again after updating the kernel version (i.e., repeat the
Generate KeyandRegister Keysteps). -
Reboot the computer
- If you set up Secure Boot in the previous step, after rebooting, enter the MOK management interface, select “Enroll MOK”, enter the password you set, and continue to start the system.
- If you disabled Secure Boot in the previous step, simply reboot the computer.
-
Confirm whether the GPU driver is installed successfully:
1nvidia-smiIf you see output similar to the following, congratulations, your Nvidia GPU driver has been successfully installed:
1 2 3 4 5 6 7 8 9 10 11+-----------------------------------------------------------------------------+ | NVIDIA-SMI 470.57.02 Driver Version: 470.57.02 CUDA Version: 12.5 | |-------------------------------+----------------------+----------------------+ | GPU Name Persistence-M| Bus-Id Disp.A | Volatile Uncorr. ECC | | Fan Temp Perf Pwr:Usage/Cap| Memory-Usage | GPU-Util Compute M. | | | | MIG M. | |===============================+======================+======================| | 0 NVIDIA RTX 4060 Ti Off | 00000000:01:00.0 Off | N/A | | N/A 41C P8 10W / N/A | 0MiB / 7611MiB | 0% Default | | | | N/A | +-------------------------------+----------------------+----------------------+
Test the GPU
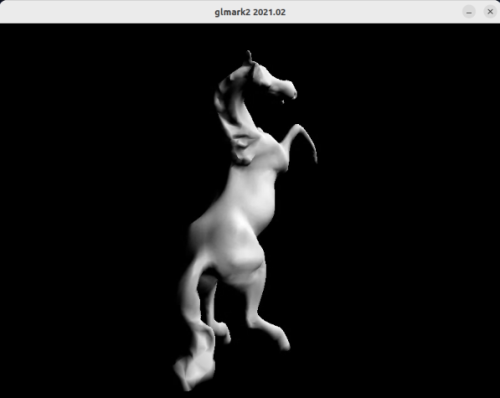
We can use glmark2 to test the GPU performance.
- Install
glmark2:
|
|
- Run
glmark2:
|
|
If you see output similar to the following in the terminal, it means the GPU performance test was successful:
|
|
And there will be a window popping up, showing the content being tested. After the test is completed, the terminal will display the test score.
Gaming
Linux systems are not originally very suitable for gaming, but with the promotion of Steam, more and more games can run on Linux through Proton. Proton is a tool developed by Valve based on Wine that allows Windows games to run on Linux.
In Ubuntu, installing Steam requires installing some additional dependencies and manually installing Proton. In Fedora, installing Steam is very simple, and it includes Proton by default.
Install Steam
- Install Steam:
|
|
- Log in to your Steam account
In the start menu, find Steam and click to open it, then log in to your Steam account.

Install Games
If this is your first time using Steam and you haven’t purchased any games yet, you can choose some free games to test, such as “Dota 2”, “Counter-Strike: Global Offensive”, etc.
Launch Games
After installation, you can click “Launch” to start the game, but it often won’t succeed the first time and may require three attempts.

- The first launch may get stuck downloading a component. Opening the download manager shows it’s trying to download Steam Linux Runtime 2.0. However, for some reason, it cannot start the download, even though Steam Linux Runtime 3.0 is already available. I had to cancel the launch.
- After canceling the first launch, trying to launch the game again allows Steam Linux Runtime 2.0 to be successfully downloaded, and the game enters the loading screen. However, it gets stuck on a full-screen black screen. I could only click to stop the game.
- On the third attempt to launch the game, it successfully loads and enters the shader compilation phase. After waiting for the shaders to compile, the game starts normally.
Game Controllers
If you are using a game controller, some additional configuration is needed. If you connect it using a USB cable, it should work directly.
If you are using an Xbox controller, you can connect it via Bluetooth. However, even if it connects, you may find that the controller still cannot control the game. This is because the relevant drivers are missing. We can install the xpadneo package to solve this problem:
|
|
Then reconnect via Bluetooth. When connected, the controller will vibrate slightly, whereas previously it did not vibrate when connected. This indicates that the controller has been successfully recognized and can be used to play games.
CUDA Programming
CUDA is a parallel computing platform and programming model developed by Nvidia that leverages the parallel computing power of GPUs to accelerate compute-intensive applications. CUDA programming requires installing Nvidia GPU drivers and the CUDA toolkit. Additionally, there is a certain compatibility relationship between CUDA versions and Nvidia GPU driver versions, so you need to choose the appropriate CUDA version based on your GPU driver version.
Update in August 2025: After installation, I found that this method still doesn’t work, mainly due to compatibility issues between Fedora 42 and CUDA 12.9. Please refer to the “Issues” section at the end for details.
Install CUDA
- Check the required CUDA version for your Nvidia GPU driver:
|
|
In the CUDA Version line, you can see the required CUDA version for your Nvidia GPU driver, for example, CUDA Version: 12.9. This means we need to install CUDA 12.9.
- Install CUDA:
When installing CUDA in Ubuntu, we directly followed the installation guide on the Nvidia official website.
In Fedora, since we used the RPM Fusion repository to install the drivers earlier, directly following the Nvidia official website may lead to version mismatch issues. For example, in the previous step, we found that we needed to install CUDA 12.9, but the Nvidia official website may only provide installation packages for CUDA 13.0. If you follow the instructions on the Nvidia official website directly, it will cause version mismatch issues. This is because RPM Fusion tests the drivers after they are released by Nvidia and only pushes them to the RPM repository after they are stable. Therefore, we still need to follow the instructions on RPM Fusion to install CUDA.
The commands are as follows:
|
|
Note that in the above commands, the installed CUDA version is for Fedora 41, while our Fedora version is 42. However, don’t worry. As mentioned in the RPM Fusion instructions, the above commands are applicable to versions after Fedora 41.
- Configure environment variables:
If the installation is successful, you will see the CUDA installation files in the /usr/local/cuda-12.9 directory. At the same time, you will see a symbolic link pointing to /usr/local/cuda-12.9 in the /usr/local/cuda directory. If you upgrade the CUDA version later, /usr/local/cuda will point to the new CUDA version directory.
We need to configure environment variables so that CUDA can be found. When adding the CUDA bin directory and lib64 directory to the PATH and LD_LIBRARY_PATH environment variables, we use the /usr/local/cuda directory instead of the /usr/local/cuda-12.9 directory, because this way, we don’t need to modify the environment variables when upgrading the CUDA version in the future.
If you are using bash, you can add the following content to the ~/.bashrc file:
|
|
If you are using another shell, you can add the above content to the corresponding configuration file of that shell.
- Test CUDA:
|
|
If you see output similar to the following, it means CUDA has been successfully installed:
|
|
Issues
After going through the above steps, it seems that we have successfully installed CUDA, but in fact, the compiler above cannot be used in Fedora 42. If you use it directly for compilation, it will report a GCC version mismatch error. This is because the installed CUDA version is 12.9, which only matches GCC 14 and below, while Fedora 42 has GCC 15 installed by default.
Besides, this issue cannot be resolved by installing GCC 14, because even if GCC 14 is installed, the libraries, header files, and other components in Fedora 42 are still of GCC 15 version, so compilation will still report errors.
This issue is difficult to resolve. One solution is to stop using RPM Fusion to install Nvidia drivers and CUDA, and instead download and install CUDA 13.0 and the corresponding drivers directly from the Nvidia official website. CUDA 13.0 supports GCC 15, but there are still two problems:
- You cannot use Fedora’s package management system to manage the installation and upgrade of Nvidia drivers and CUDA. If there are dependencies related to them managed by Fedora, then any update may fail. In severe cases, it may even affect system stability.
- As of August 2025, PyTorch, commonly used in deep learning, has not yet adapted to CUDA 13.0, so installing CUDA 13.0 still cannot support many deep learning tasks.
If you insist on using the Fedora system, I currently (as of August 2025) have two solutions:
- One is to give up Fedora 42 and switch to Fedora 41. But this probably cannot be achieved through a simple system version downgrade, as it involves too many components. A system reinstallation is likely required.
- The other is to use a virtualized container for configuration. Perhaps when RPM Fusion and PyTorch both support CUDA 13.0 in the future, the container can be discarded.
I have thought it over and chosen the second option. I decided to keep the installed Nvidia drivers and CUDA here, and set up a separate Docker/Podman container for the CUDA programming and deep learning development environment. The main idea is to run Ubuntu 24.04 in the container and install compatible CUDA and Nvidia drivers. Since PyTorch does not yet support CUDA 13.0, I will use CUDA 12.9 in the container. The specific configuration process will be documented in a separate article, please refer to: