Background
This is the fourth article introducing Docker containers. Links to other articles in this series are as follows:
- Container (1): Introduction to Container-related Knowledge - Containerization, Docker, Docker Compose, Kubernetes / K8s, etc.
- Container (2): Docker Best Practices Guide - Docker Compose and Portainer
- Container (3): Docker Best Practices Guide - Volume Management
- Container (5): Docker Best Practices Guide - Container Update Monitoring Tool WUD (What’s Up Docker)
- Container (6): Misconceptions, Bad Habits, and Issues When Using Docker
After creating a container, we may need to update or upgrade it to use new features or fix bugs. If we change servers or upgrade the hardware of our computer, we may need to migrate the container to the new server or to a new hard drive.
Disclaimer: If the official documentation of the container has instructions on updating, upgrading, or migrating, please refer to the official documentation first. This article only introduces general container updates, upgrades, and migrations.
Prerequisites
- Docker and docker-compose must be installed
- Understand the basic concepts and usage of Docker
- Use docker-compose to manage containers (if you do not use docker-compose to manage containers, or do not want to use docker-compose to manage containers, then this article is for reference only)
Changing Containers
Whether it is updating, upgrading, or migrating a container, the essence is to make some changes to the original container. Here we need to clarify which part of the container has been changed. Generally speaking, changes to the container involve the following parts:
-
Image: Containers are created from images. If you want to use new features of the container, fix bugs, or revert to old features of the container, you need to update or replace the image. This is usually the most common and convenient change. Because ordinary users are usually users of the image, not creators of the image. We only need to pull the new image from the repository or delete the old image without worrying too much about other things.
-
Container Configuration: The configuration of the container refers to the runtime parameters of the container, such as environment variables, port mappings, data volume mounts, etc. Generally speaking:
- When updating or upgrading a container, we need to consult the official documentation or release notes to see if new configuration items have been added or old configuration items have been modified. We need to modify the container’s configuration according to the official documentation or release notes. Otherwise, we do not need to modify the container’s configuration when updating or upgrading the container.
- When migrating a container, we need to modify the container’s configuration according to the environment of the new server, such as modifying the mount path of the data volume, port mappings, etc.
-
Data: The data here is divided into two categories
-
Software Configuration Data: The software configuration here refers to the configuration of the software running in the container, such as database configuration, web service configuration, etc. Generally speaking, the software configuration is stored in the data volume specially created for the container.
- When updating or upgrading a container, we often do not need to do anything. The upgraded container will inherit the previous software configuration.
- When migrating a container, we need to migrate the data volume that stores the software configuration to the new server or new hard drive.
-
User Data: User data refers to the data uploaded by users to the container, such as user-uploaded images, videos, etc., as well as account and password data of the software users themselves. Generally speaking, user data is stored in the data volume in the form of a database or folder. When updating or migrating a container, the most concerned are these data.
-
Basic Process of Updating and Upgrading Containers
The basic process of updating and upgrading containers is as follows:
Determine Version
Before updating or upgrading a container, we need to determine which version to update or upgrade to. Generally speaking, the version number of the container is determined by the tag of the image. We can use the following command to view the current version number of the container:
|
|
or
|
|
or view the container’s details in Portainer to find the image’s tag information.
It is important to note that many containers are often created with the latest tag, which refers to the latest version. Many tutorials online also use the latest tag for images. I used to create containers this way, but later found that it is not a good practice. If a container is not updated for a long time, there may be a significant gap between our container and the latest version in the repository. When updating or upgrading the container, we may encounter some issues. Moreover, we cannot intuitively see the gap between our container and the latest version. It is also difficult to mark the version when backing up and migrating containers.
Therefore, I recommend using specific version numbers when creating containers, rather than the latest tag. This way, when we want to update the container, we can check the official repository for the latest version number. If the gap between the old and new version numbers is not large, we can update directly. If the gap is large, we may need to update one version at a time.
Updating and Upgrading Containers
When using docker-compose to manage containers, updating or upgrading a container generally involves three steps:
-
Stop the Container
1sudo docker-compose stopor
1sudo docker-compose down -
Modify the docker-compose.yml file
- Change the image tag to the new version number
- Modify other configuration items (if needed)
-
Recreate the Container
1sudo docker-compose up -d
This command will automatically pull the new image and recreate the container when it detects that we have updated the image version number.
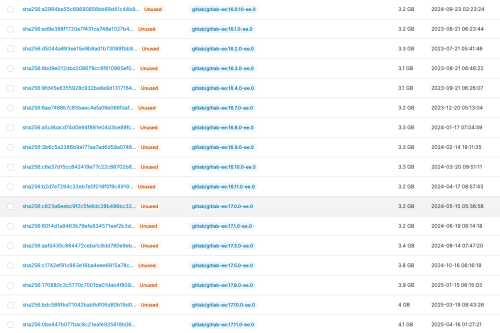
If the current container version number and the latest version number differ significantly, we may need to update one version at a time. For example, after creating the GitLab container, I didn’t update it for nearly two years, resulting in a gap of two major versions and more than a dozen minor versions from the latest version. If I directly update to the latest version at this point, the container may fail to start due to compatibility issues. GitLab actually handles this quite well; if you check the logs, you’ll find it will prompt you:
|
|
This indicates that we cannot directly upgrade from 16.0.4 to 16.7.0, but need to first upgrade to 16.3.x. However, in my actual testing, I found that it seems we also cannot directly upgrade from 16.0.4 to 16.3.0, and can only upgrade to 16.1.0 first. In short, it took me nearly two hours to gradually update more than a dozen versions before I could update GitLab to the latest version.
Migrating Containers
Migrating containers is a bit more complex, mainly because we need to migrate the data volumes to the new computer or new hard drive, and also ensure that the container can correctly read the data in the data volumes.
Determine Container Image Version and Data Volume Location
Before migrating a container, we need to determine the image version of the container to avoid compatibility issues. The issue of image version numbers has been mentioned earlier; when creating containers, we should try to use specific version numbers instead of the latest tag, so that we can clearly know the version number of the container during migration. If we don’t know, we can use the commands mentioned above to check.
The location of the data volumes can be found in the docker-compose.yml file, and there are several situations:
-
Named Volumes: The name of a named volume is unique and can be accessed by name. The data for named volumes is stored in the host’s
/var/lib/docker/volumesdirectory. -
Bind Mounts: The location of a bind mount data volume is the path defined before the colon in the definition. If it is a read-only bind mount, we generally do not need to worry about it during migration.
-
Temporary Volumes: The data for temporary volumes is stored in the host’s
/var/lib/docker/containersdirectory. The data for temporary volumes will be deleted when the container is stopped or removed, so we generally do not need to worry about it during migration. -
Anonymous Volumes: We should avoid using anonymous volumes. If we must use them, their data will be deleted when the container is stopped or removed, and we generally do not need to worry about it.
Migrating Data Volumes
Migrating data volumes is different from regular file migration, mainly because we need to pay attention to the permission issues of the data volumes. If the permissions of certain files change after migration, it may cause the container to be unable to access the files in the data volumes. We can use the rsync command to migrate data volumes, and the specific command is as follows:
|
|
The rsync command is a tool for file synchronization and backup, which can efficiently copy and synchronize files between local or remote computers. It supports incremental backups, compressed transfers, and preserving file permissions, making it very suitable for migrating data volumes. Among them, -a means to copy files in archive mode, preserving file permissions, timestamps, and other information; -H means to preserve hard links; -A means to preserve ACL permissions; -X means to preserve extended attributes; --progress means to display the copy progress.
Additionally:
-
If you encounter issues with certain files not being copied when using the above command, you can use
sudoto elevate permissions, for example:1sudo rsync -aHAX --progress /path/to/source/ /path/to/destination/ -
If the destination is another local directory that already has some files,
rsyncwill automatically skip those files and only copy the files that do not exist in the source directory. If there are some files in the destination directory that do not exist in the source directory and you want to delete them, you can add the--deleteoption.1rsync -aHAX --progress --delete /path/to/source/ /path/to/destination/ -
If the source and destination files are not on the same machine, you can use the address of the remote computer to copy, for example:
1rsync -aHAX --progress /path/to/source/ user@remote:/path/to/destination/ -
If the remote computer is not using port 22, you can use the
-eoption to specify the ssh port, for example:1rsync -aHAX --progress -e "ssh -p 2222" /path/to/source/ user@remote:/path/to/destination/ -
If the remote computer uses ssh key login, you can use the
-eoption to specify the ssh key, for example:1rsync -aHAX --progress -e "ssh -i /path/to/key" /path/to/source/ user@remote:/path/to/destination/
Migrating docker-compose.yml File
The reason for migrating the docker-compose.yml file after migrating the data is that the data volume paths on the new computer or new hard drive may change. We need to modify the data volume paths in the docker-compose.yml file after migrating the data.
This step is actually very simple, just don’t forget to modify the data volume paths.
Recreating Containers
After migrating the data and the docker-compose.yml file, we can use the following command to recreate the containers:
|
|
If this is the first time starting the container, or if you need to rebuild the container, you can use:
|
|
If all goes well, the container migration will be successful!