Motivation
I previously thought it was unnecessary to set up my own identity authentication service, as I could simply create users and passwords in the services I deployed. However, while preparing to set up a HeadScale (self-hosted version of Tailscale) server, I found that the available UI options for HeadScale do not support direct user and password creation.
Without an authentication service, I would have to enter an API key every time, which is a long and irregular string that is nearly impossible to remember. If I use an authentication service, I can utilize many existing services like Google, Apple, Microsoft, GitHub, etc. However, since I am already self-hosting various services, why not also set up my own identity authentication service to keep all data under my control?
The setup of identity authentication services can be done in many ways, such as using Authentik, Keycloak, or Authelia. Authentik and Keycloak are more complex and resource-intensive, while I need a simpler service that allows the creation of just a few users. Therefore, I chose Authelia.
Authelia Overview
Authelia is an open-source authentication and single sign-on (SSO) solution that supports various authentication methods, including username and password, two-factor authentication (2FA), WebAuthn, etc. It can integrate with multiple authentication backends such as LDAP, Active Directory, MySQL, PostgreSQL, etc. Authelia also supports various authentication protocols like OAuth2, OpenID Connect, SAML, etc.
When using HeadScale, I primarily need to use the OpenID Connect (OIDC) protocol for authentication. Authelia supports the OpenID Connect protocol and can be integrated with HeadScale.
Authelia’s main features include:
- Open Source: Authelia is an open-source project that can be freely used and modified.
- Multiple Authentication Methods: Supports username and password, two-factor authentication (2FA), WebAuthn, and other authentication methods.
- Multiple Authentication Backends: Supports LDAP, Active Directory, MySQL, PostgreSQL, and other authentication backends.
- Multiple Authentication Protocols: Supports OAuth2, OpenID Connect, SAML, and other authentication protocols.
- Single Sign-On (SSO): Supports single sign-on, allowing identity information to be shared across multiple applications.
- Multiple Authentication Policies: Supports various authentication policies, such as IP-based, time-based, etc.
Authelia’s limitation is that it currently does not provide a graphical management interface; all configurations must be done through YAML files. However, Authelia’s official roadmap plans to introduce a management interface (including both graphical and command-line interfaces) in future versions, as detailed in the Roadmap. We look forward to this feature.
How Authelia Works
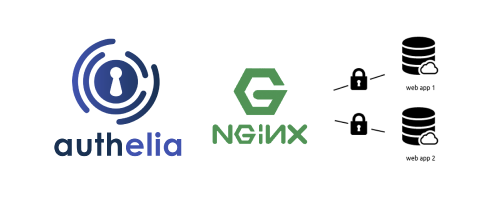
Authelia is merely an authentication service and does not provide any applications or services itself. Its working principle is to integrate with other applications or services to achieve authentication. When using Authelia, I primarily integrate it with Nginx. Nginx acts as a reverse proxy server, forwarding user requests to Authelia for authentication and then forwarding the requests to the actual application or service.
Typically, when a user accesses a web application, the process is as follows:

That is:
- The user enters the URL of the web application in the browser and accesses the server via HTTP or HTTPS.
- The server processes the request with Nginx, which forwards the request to the corresponding application.
- The application processes the request and returns a response to Nginx.
- Nginx returns the response to the user’s browser.
If the web application has built-in authentication, a login window may pop up when the user accesses the application, prompting the user to enter a username and password. If authentication is successful, the application stores the user’s identity information in a session and allows access to other parts of the application.
However, some web applications do not have built-in authentication. In such cases, if you want to restrict user access, you can add an authentication service layer. Authelia is such an authentication service. If we add Authelia authentication service to a web application, the user’s access process is as follows:

That is:
- The user enters the URL of the web application in the browser and accesses the server via HTTP or HTTPS.
- The server processes the request with Nginx, which forwards the request to Authelia for authentication.
- Authelia verifies the user’s identity information:
- If authentication is successful, it forwards the request to Nginx. Nginx then forwards the request to the corresponding application. The application processes the request and returns a response to Nginx. Nginx returns the response to the user’s browser.
- If authentication fails, it returns a 401 Unauthorized response and does not forward the request to the application. The user cannot access the application’s services.
Deploying Authelia with Docker
We can use docker compose to deploy Authelia. We need to prepare a docker-compose.yml file and two configuration files, with the following structure:
|
|
where:
docker-compose.ymlis the Docker Compose configuration file that defines the Authelia service, networks, and volumes.- The
configdirectory contains the Authelia configuration fileconfiguration.ymland the user configuration fileusers.yml. .envis the environment variable file used to define Authelia’s environment variables.
docker-compose.yml
|
|
where ${DATA_DIR}/data is an environment variable that specifies the directory where Authelia will store its data. We can define this variable in a .env file, for example:
|
|
Configuration Files
Authelia’s configuration files include configuration.yml and users.yml. The configuration.yml file contains the main configuration for Authelia, while the users.yml file contains user information. Please refer to the official documentation for detailed configuration options. Below is a simple example of each configuration file.
configuration.yml
|
|
Here, identity_providers defines an OIDC identity provider. If other applications need to use OIDC authentication, they can use this provider. We can define multiple OIDC clients in clients, each with a client_id and client_secret for authentication. For detailed explanations of each configuration item, please refer to the comments in the configuration file.
users.yml
|
|
Here we define an Authelia user with the username user1. Note that the password is a hashed password, not a plaintext password. We can use Authelia’s command-line tool to generate a hashed password, for example:
|
|
Replace the generated hashed password in the users.yml file.
The email address is not important; it can be any valid email address. The groups field indicates the groups to which the user belongs. Authelia supports various groups, such as admins, users, etc. We can define these groups in the configuration file and assign different permissions to each group.
Starting Authelia
After preparing the above, we can start Authelia. In the authelia directory, execute the following command:
|
|
This command will start the Authelia service in the background and bind it to port 9091. We can access Authelia’s web interface at http://localhost:9091.If everything is working correctly, we should see Authelia’s login interface.

Enter the username and password configured above, which are user1 and your-user1-password. Note that here the password is in plaintext, not a hashed password.
If the login is successful, we will be redirected to the default redirection URL configured above, which is https://example.com.
Integrating Authelia with Other Services
As mentioned above, other applications or services can integrate with Authelia for authentication. Here, we will take a simple Whoami application as an example to demonstrate how to integrate with Authelia.
Whoami Application
Whoami is a simple web application that returns information about the request, such as the IP address, request headers, request method, etc. We can use Whoami to test Authelia’s authentication functionality.
-
Deploy Whoami Application
We can use Docker Compose to deploy the Whoami application. We need to prepare a
docker-compose.ymlfile with the following content:1 2 3 4 5 6 7 8version: '3.8' services: whoami: image: traefik/whoami:v1.11.0 container_name: whoami restart: always ports: - "2001:80" -
Start Whoami Application
In the
whoamidirectory, execute the following command:1docker compose up -dThis command will start the Whoami service in the background and bind it to port 2001. We can access Whoami’s web interface at
http://localhost:2001.If everything is working correctly, we should see Whoami’s interface.

-
Configure Nginx Reverse Proxy
We need to configure Nginx as a reverse proxy to forward user requests to Authelia for authentication and then forward the requests to the Whoami application.
We need to prepare an Nginx configuration file with the following content:
1 2 3 4 5 6 7 8 9 10 11 12 13 14 15 16 17 18 19 20 21 22 23 24 25 26 27 28 29 30 31 32 33 34 35 36 37 38 39 40 41 42 43 44 45 46 47 48upstream <whoami.example.com> { server 127.0.0.1:2001; } server { listen 80; server_name whoami.example.com; return 301 https://whoami.example.com$request_uri; } server { listen 443 ssl; server_name whoami.example.com; # ssl 配置 ssl_certificate </path/to/fullchain.cer>; ssl_certificate_key </path/to/whoami.example.com.key>; # Step 1: internal location that calls Authelia for authentication location /authelia { internal; proxy_pass http://localhost:9091/api/verify; proxy_set_header Content-Length ""; proxy_pass_request_body off; proxy_set_header X-Original-URL $scheme://$host$request_uri; proxy_set_header X-Real-IP $remote_addr; proxy_set_header X-Forwarded-For $proxy_add_x_forwarded_for; proxy_set_header X-Forwarded-Proto $scheme; } # Step 2: protect Whoami via Authelia location / { # This sends an internal subrequest to Authelia for verification auth_request /authelia; # Redirect to Authelia portal if unauthorized error_page 401 =302 https://<authelia.example.com>/?rd=https://$host$request_uri; proxy_pass http://whoami.example.com; proxy_set_header Host $http_host; proxy_set_header X-Real-IP $remote_addr; proxy_set_header X-Forwarded-Ssl on; proxy_set_header X-Forwarded-For $proxy_add_x_forwarded_for; proxy_set_header X-Forwarded-Proto $scheme; proxy_set_header X-Frame-Options SAMEORIGIN; } }Here, the
server_nameneeds to be replaced with your own domain or IP address. Thessl_certificateandssl_certificate_keyneed to be replaced with the paths to your own SSL certificate and private key.Then reload the Nginx configuration:
1sudo systemctl reload nginxBased on the above Nginx configuration, we can see that the process of using Authelia to authenticate users for Whoami is as follows:
- The user accesses
https://whoami.example.com. Nginx will forward the request to/authelia, which is Authelia for authentication, based on theauth_requestdirective. - This authentication request is then forwarded to Authelia’s
/api/verifyendpoint. - Authelia verifies the user’s identity.
- If the verification is successful, it returns a 200 OK response, and Nginx will forward the request to the Whoami application.
- If the verification fails, it returns a 401 Unauthorized response, and Nginx will redirect the request to Authelia’s login page.
- The user accesses
Testing Authentication
Now we can test the authentication functionality by accessing http://example.com (replace with your own domain or IP address).
If everything is working correctly, we should see Authelia’s login interface:
Enter the username and password, which are user1 and your-user1-password. Note that here the password is in plaintext, not a hashed password.
If the login is successful, we will be redirected to the Whoami application interface.
If the username or password is incorrect, it will prompt “Invalid username or password” and return to Authelia’s login interface.
Summary
We have used Authelia to set up a simple authentication service and demonstrated how to integrate it with a simple Whoami application. If you want to integrate with other applications that have already been deployed, you only need to add the corresponding configuration in Nginx.