Motivation
I used to manage my notes with Microsoft’s OneNote. OneNote is powerful, capable of tracking note revision history, and can sync notes using OneDrive. However, it has many drawbacks. The most unbearable one for me is its default font, Calibri, which cannot be changed (or even if changed, it never takes effect). I really don’t understand why such a simple thing as changing the default font has not been resolved for so many years. I have to tedious change the font to Times New Roman every time.
After starting to self-host various services, I began to look for a self-hosted note management software. After trying Joplin, Trilium, SiYuan, Logseq, and other software, I finally chose Obsidian. The advantages of Obsidian are:
- Simple and clean interface, powerful features, and support for Markdown syntax
- Plugin support for extended functionality
- Cloud sync support, allowing the use of Nextcloud to sync notes
- Multi-platform support, available on Windows, Linux, Mac, Android, and more
- Note files are stored as plain text files, making backup and migration easy
- Support for custom themes and styles, allowing users to modify the interface according to their preferences
These basically meet all my requirements for note management software.
This is the first article in the Obsidian series, mainly introducing the installation and configuration of Obsidian, as well as how to use Nextcloud to sync Obsidian notes. Other articles in this series include:
Prerequisites
- Docker and Docker Compose
- Nextcloud
For installation and preparation of the above software and tools, please refer to “Using Nextcloud and Docker to Build a Personal Cloud Storage”
Obsidian
Obsidian Overview
Obsidian’s official description is that it is a Markdown editor and a knowledge base software. I don’t really need the features of a Markdown editor, and I basically just use it as a note-taking software. Obsidian’s note files are stored in Markdown format, and all note files are stored in a folder, with the file name being the title of the note. Obsidian supports bidirectional links, making it easy to establish links between different notes.
Obsidian supports cloud synchronization, and you can register for an Obsidian account and subscribe to the Obsidian sync service, starting at $4 per month. Since I have already self-hosted Nextcloud, I don’t need to spend this money and can directly use Nextcloud to sync Obsidian notes.
Obsidian Installation
Obsidian supports Windows, Linux, Mac, and Android platforms, and also provides a browser plugin for use in the browser. You can directly go to the Obsidian official website to download the installation package for your platform.
Obsidian Configuration
Create a Vault
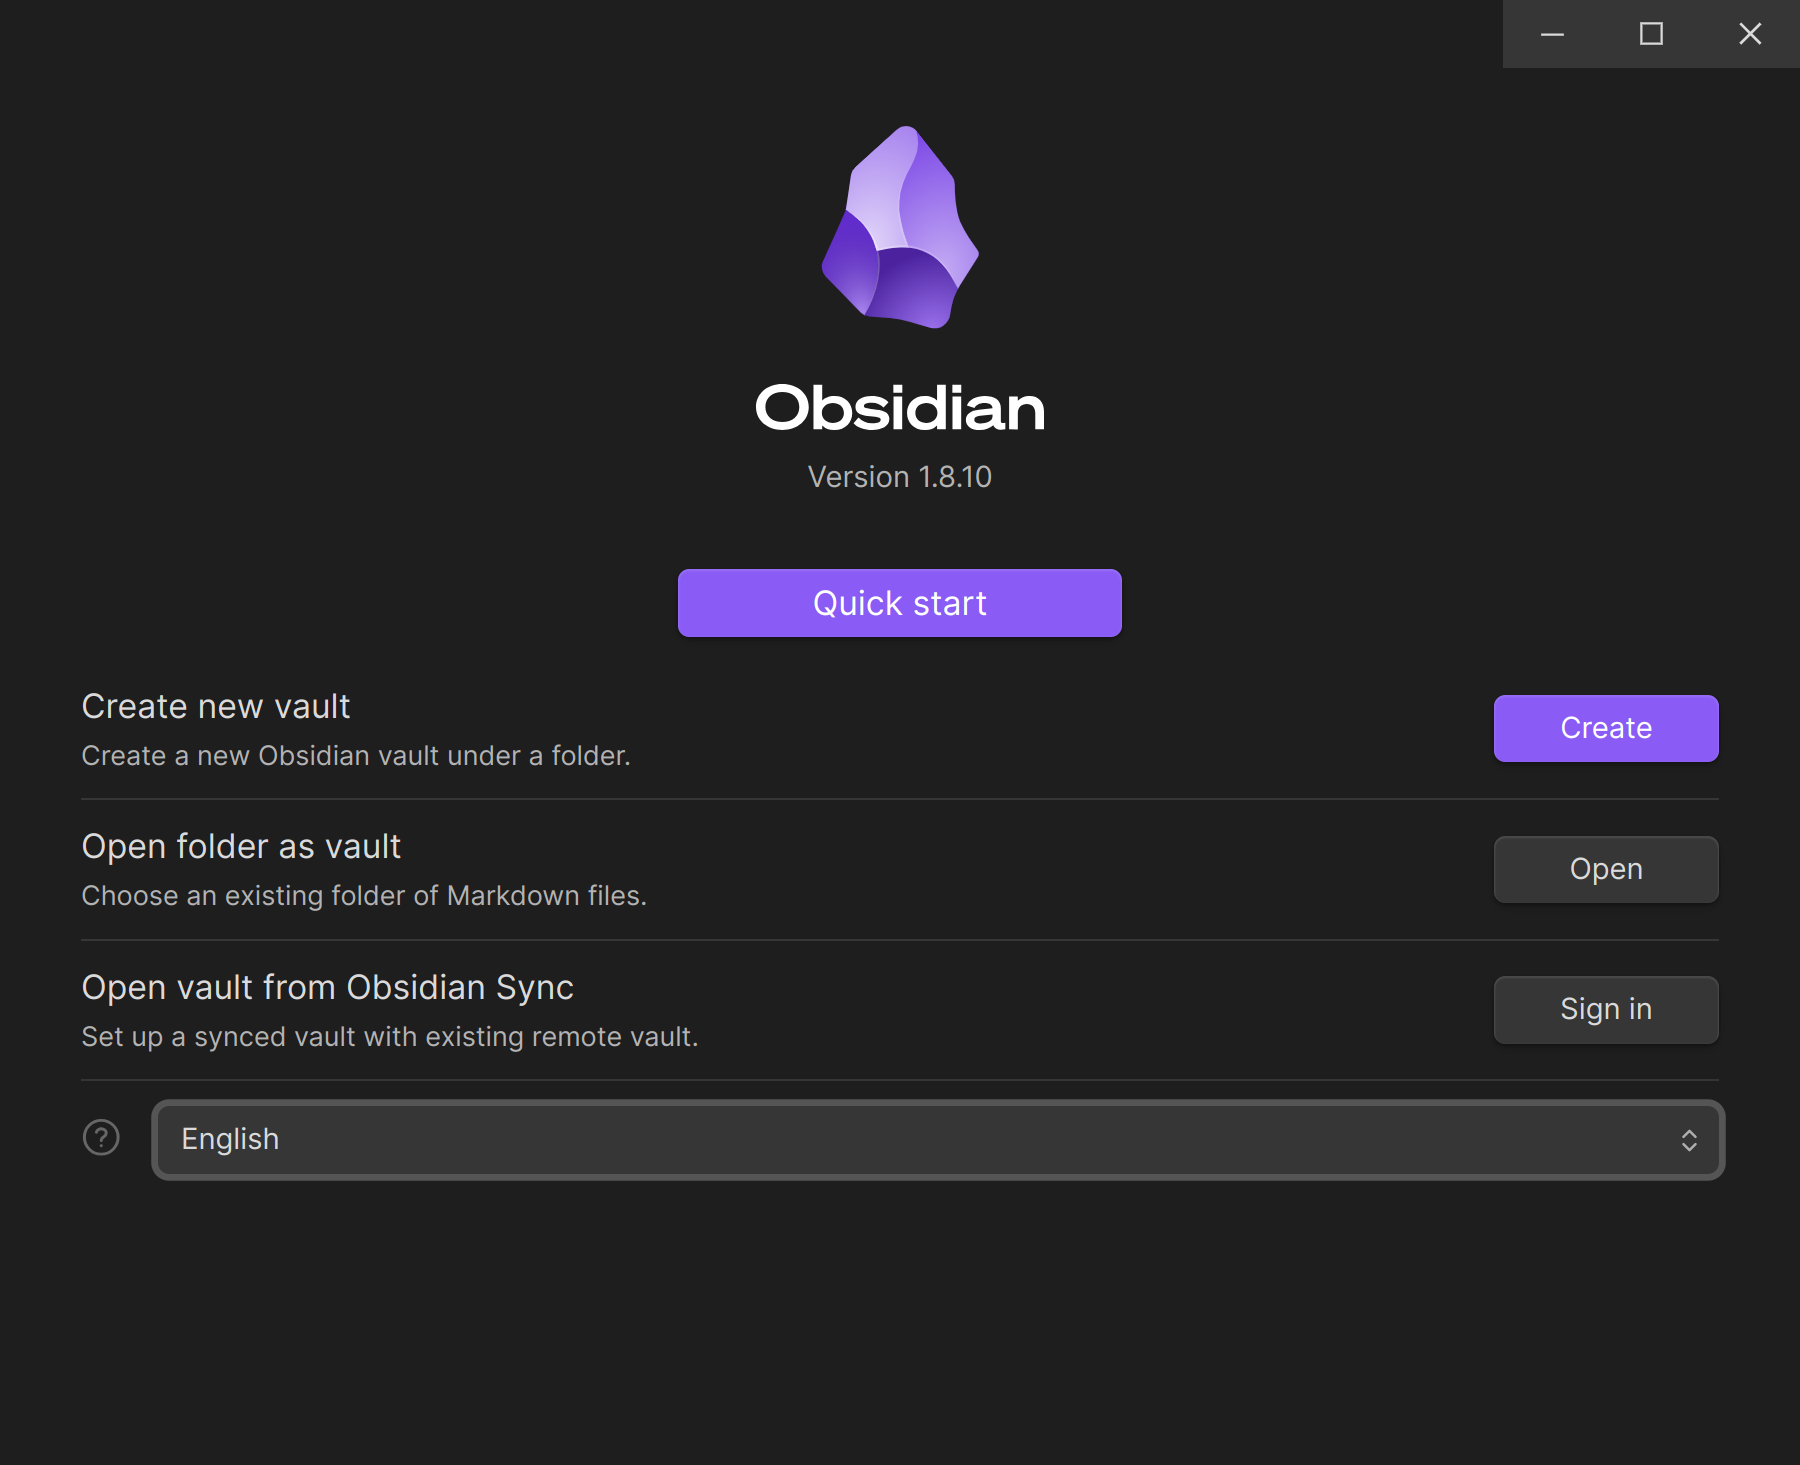
After installation, open Obsidian, and it will prompt you to choose the location and name for your notes. We select a folder to store the notes, such as /home/user/Documents/Obsidian, and then click “Create New Vault” to create a new vault. My vault name here is “Jin Li Obsidian”:
After creation, Obsidian will place all the notes we create into this folder. We can create new notes in this folder or copy existing notes into this folder.
Install and Configure Plugins
Since we want to use Nextcloud to sync Obsidian notes, we need to install a plugin to achieve this functionality. Obsidian’s plugins are divided into two categories:
- Core Plugins: Built-in plugins that can be enabled directly
- Community Plugins: Third-party developed plugins that need to be installed manually
The plugin we need to install is “Remotely Save,” which is a community plugin. Community plugins are disabled by default in Obsidian, so we need to enable it manually first.
- Click the settings button in the lower left corner to open the settings interface.

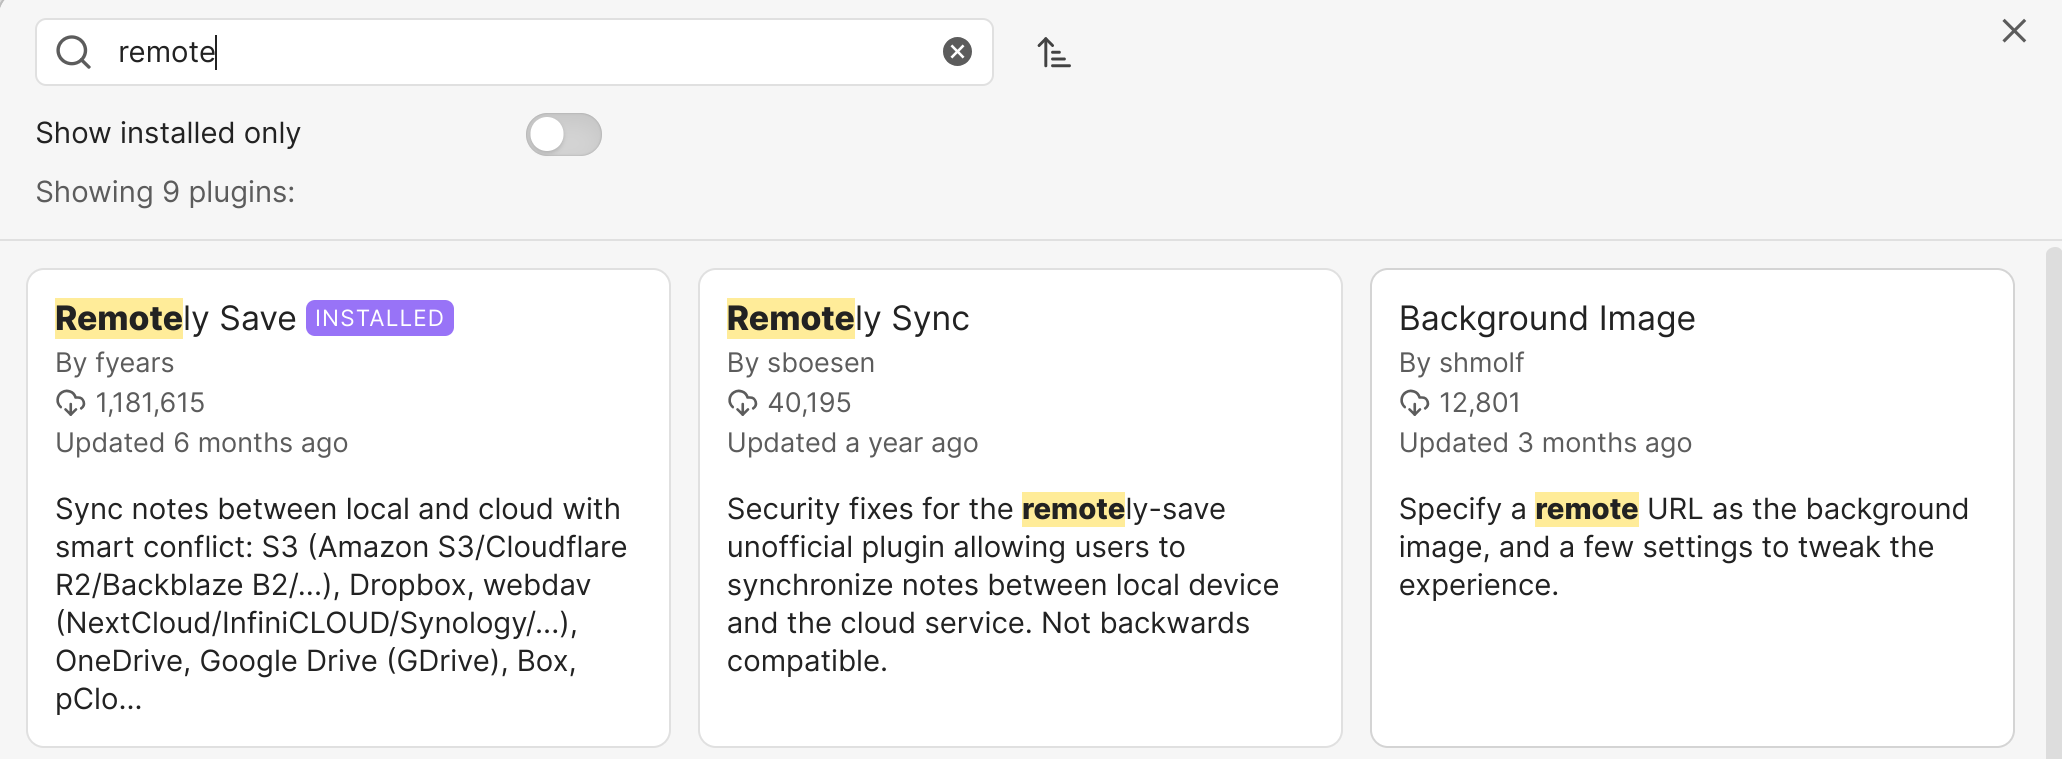
- Click “Community Plugins,” then enable it, and you can search for and install community plugins. Here we search for the “Remotely Save” plugin:
Click in and there will be an installation option. After the installation is complete, click enable.
- After successful installation, you will see the “Remotely Save” plugin in the “Installed Plugins” section:
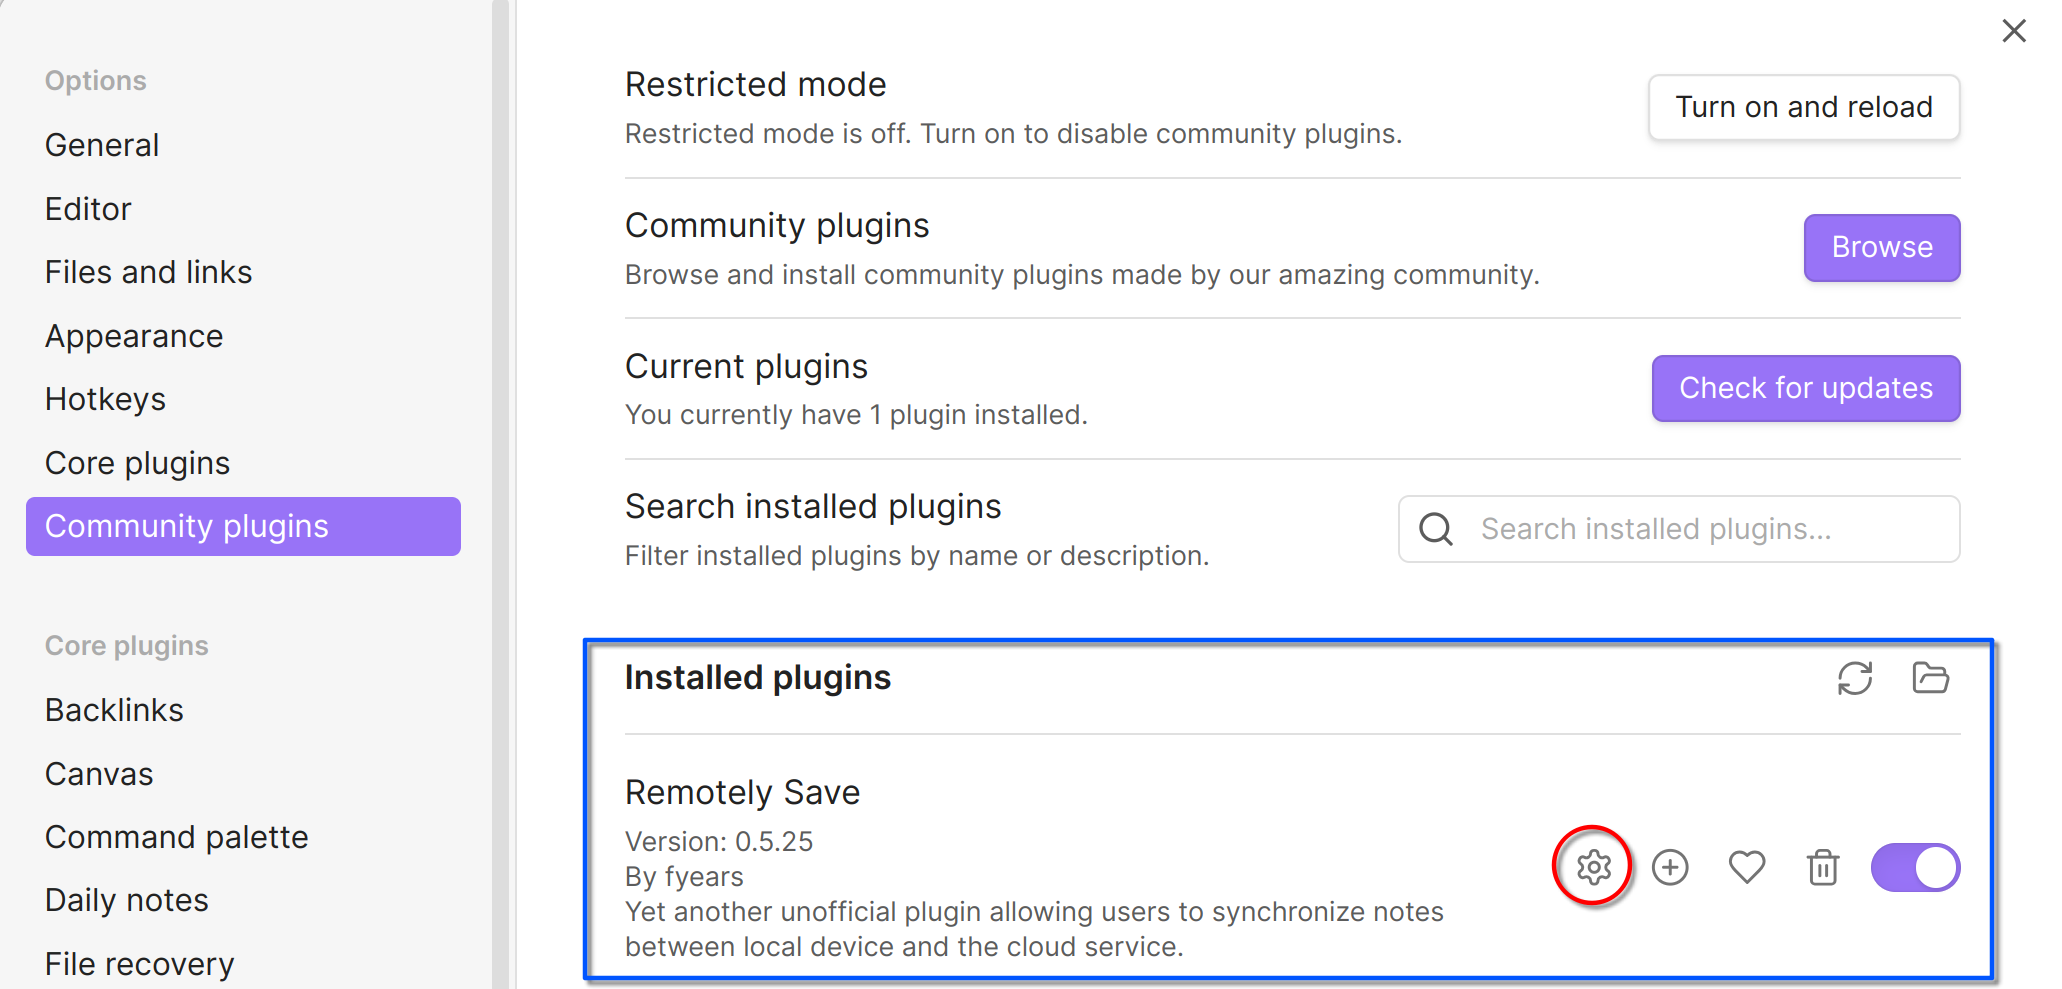
Click the gear icon to enter the settings interface:
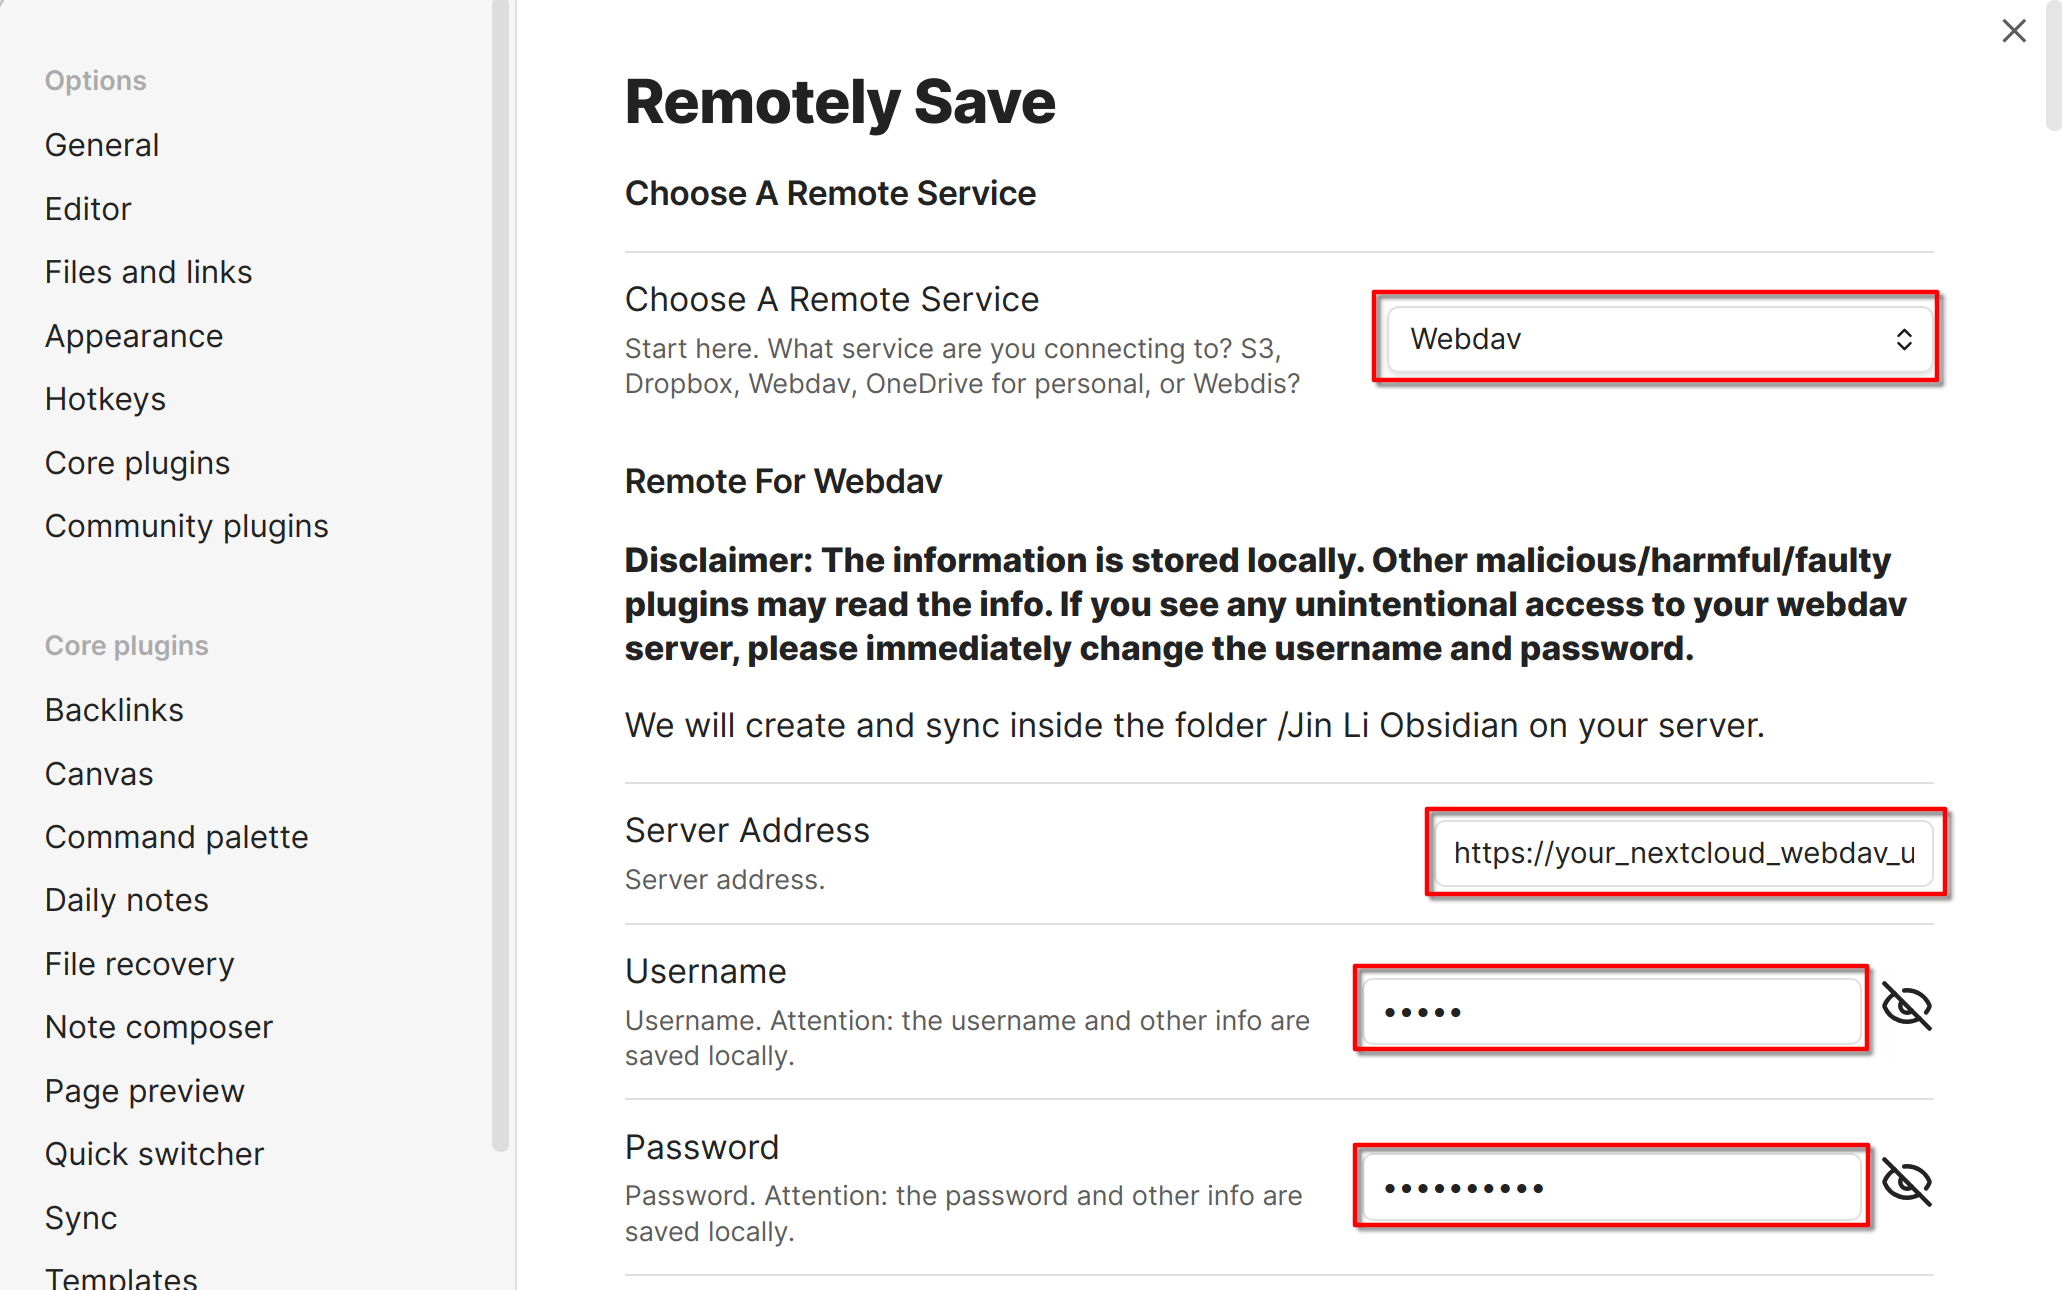
The main options that need to be set are:
Choose A Remote Service: Select “Webdav”
Server Address: Fill in the WebDAV address of Nextcloud, such as
https://<your-nextcloud-domain>/remote.php/dav/files/<username>/Obsidian/. You can log in to Nextcloud, open the folder where you want to store Obsidian notes, click the gear icon in the lower left corner to open “File Settings,” and then you can see the WebDAV address in “WebDAV”: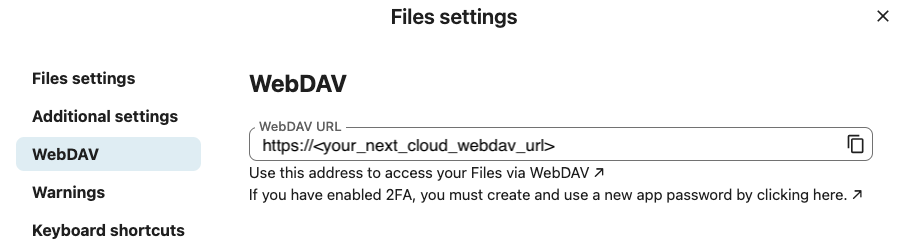
Copy this address and paste it into Obsidian’s “Server Address.”
Username: Fill in the Nextcloud username
Password: Fill in the Nextcloud password
- After the settings are complete, you can sync the notes created in Obsidian to Nextcloud. We can create a new note in Obsidian and then click the “Remotely Save” plugin icon to save the note to Nextcloud:
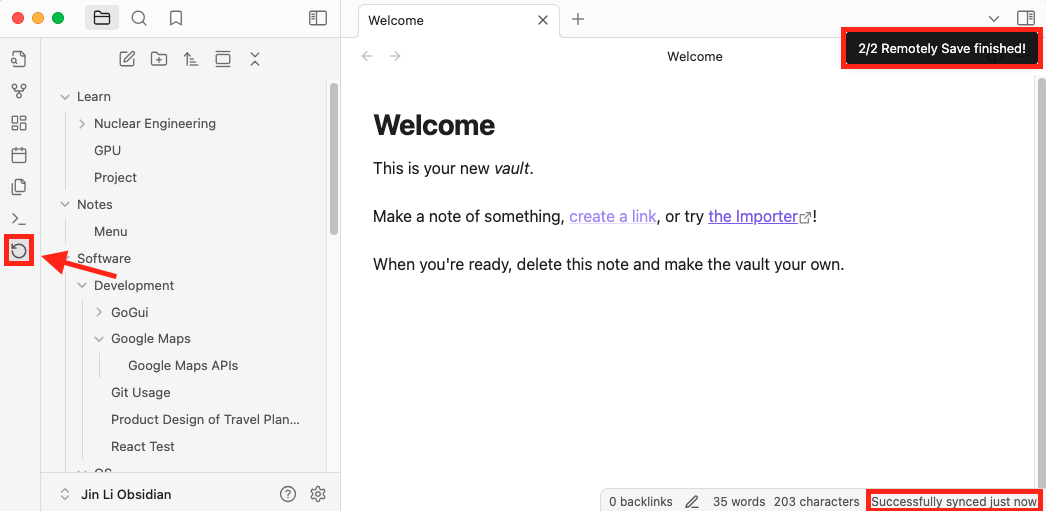
After clicking, a prompt will pop up in the upper right corner indicating that the sync was successful, and the status will also be displayed in the lower right corner.
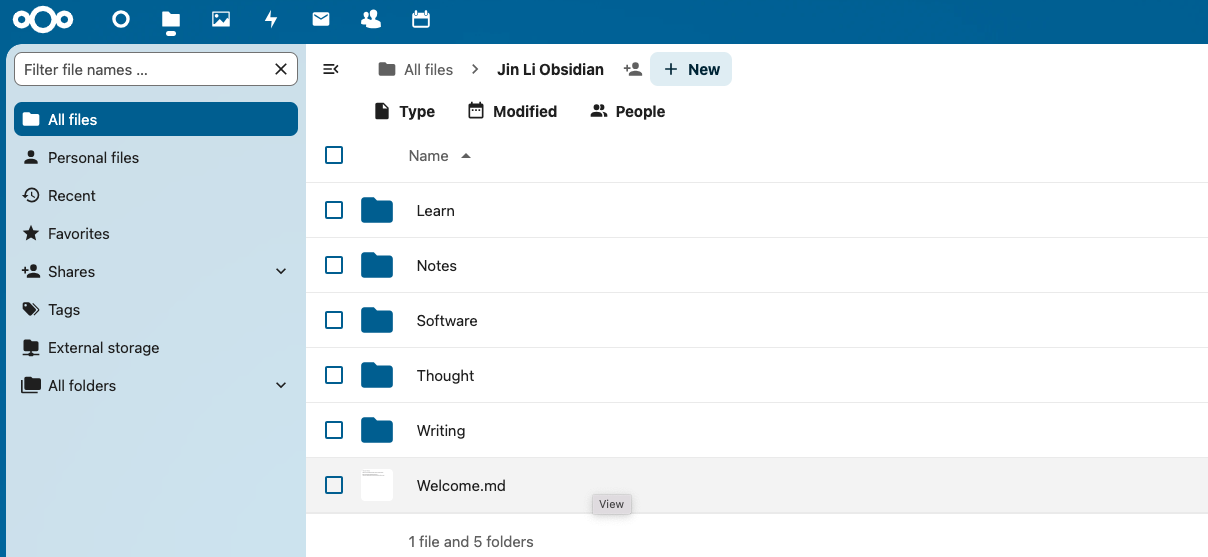
- Log in to Nextcloud, open the folder where you store Obsidian notes, and you will see the notes you created in Obsidian:
Multi-Device Sync
Obsidian is a cross-platform note-taking software, and you can also use it on other computers or mobile devices. When installing on other devices, you need to pay attention to the following points:
After installing Obsidian on other devices, the first time you open it, you will be prompted to create a vault. The name of the vault you enter here needs to be the same as before, for example, “Jin Li Obsidian.”
Install and enable the “Remotely Save” plugin on other devices as well.
When configuring the “Remotely Save” plugin on other devices, the WebDAV address, username, and password for Nextcloud need to be the same as before. If you don’t want to enter them one by one, the “Remotely Save” plugin provides the ability to export and import configurations. You can configure it on one device and then export the configuration file:
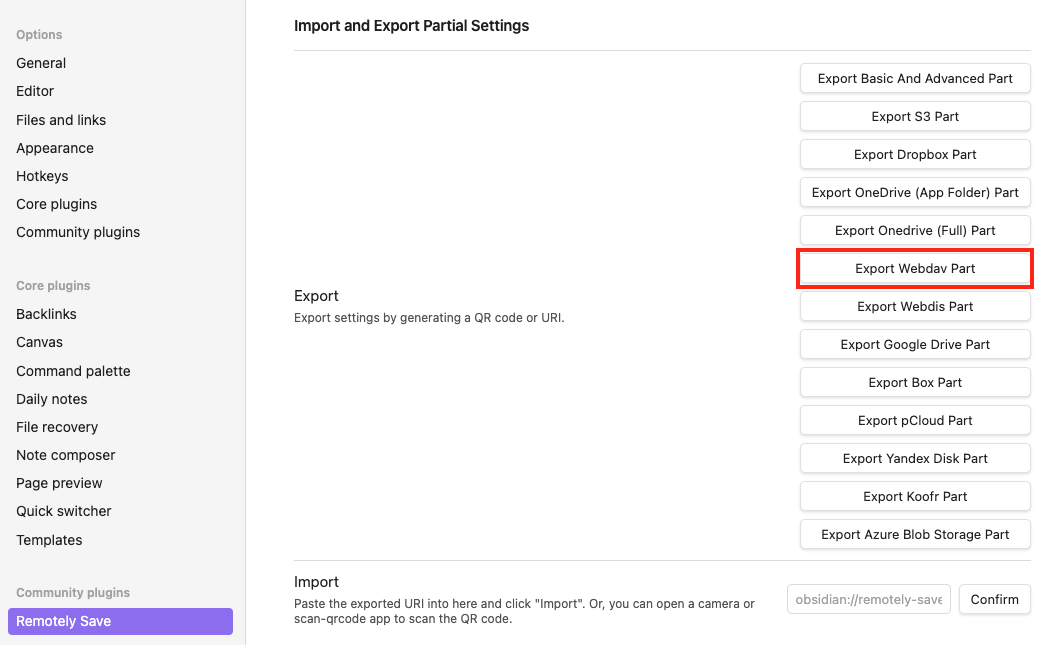
The exported configuration is a string that starts with “obsidian://remotely-save”. You can copy it, then open Obsidian on other devices, click the settings button for the “Remotely Save” plugin, click “Import Settings”, paste the copied string, and click confirm to import the configuration:

Finally, close the plugin settings interface, return to Obsidian, and click the “Remotely Save” plugin icon in the left sidebar. Obsidian will sync the notes from Nextcloud to the new device.